You wanna get new articles as RSS feed? Click this icon:

Articles
October 3, 2023Advanced Tips / Ionic NewsIf native mobile app testing makes you feel like you’re stuck in a “for” loop without an exit condition, then Native App Previews in Appflow are for you! Appflow, the mobile CI/CD solution built by Ionic, now offers in-browser testing on native virtual devices for both iOS Simulator and Android Debug builds.
Read this blog article: https://ionic.io/blog/simplify-native-build-testing-with-native-app-previews-in-appflow [...]

July 21, 2023Announcement / Ionic NewsUnbelievable, there I am watching the latest Ionic Show 2023 and by the way Max and Mike from Ionic Team tell me that Ionic is 10 years old. Happy birthday, Ionic!
In their video they also talk about good news for PWA developers – and, of course, about A.I. 😉
Watch their video full of interesting information and have fun!
BTW: Thanks to all the readers of my books who have followed me faithfully and enthusiastically for more than half a decade. You guys are amazing!
Watch the latest Ionic 7 show! [...]
July 10, 2023Announcement / Ionic News / UncategorizedLadies and gentlemen, developers and visionaries,
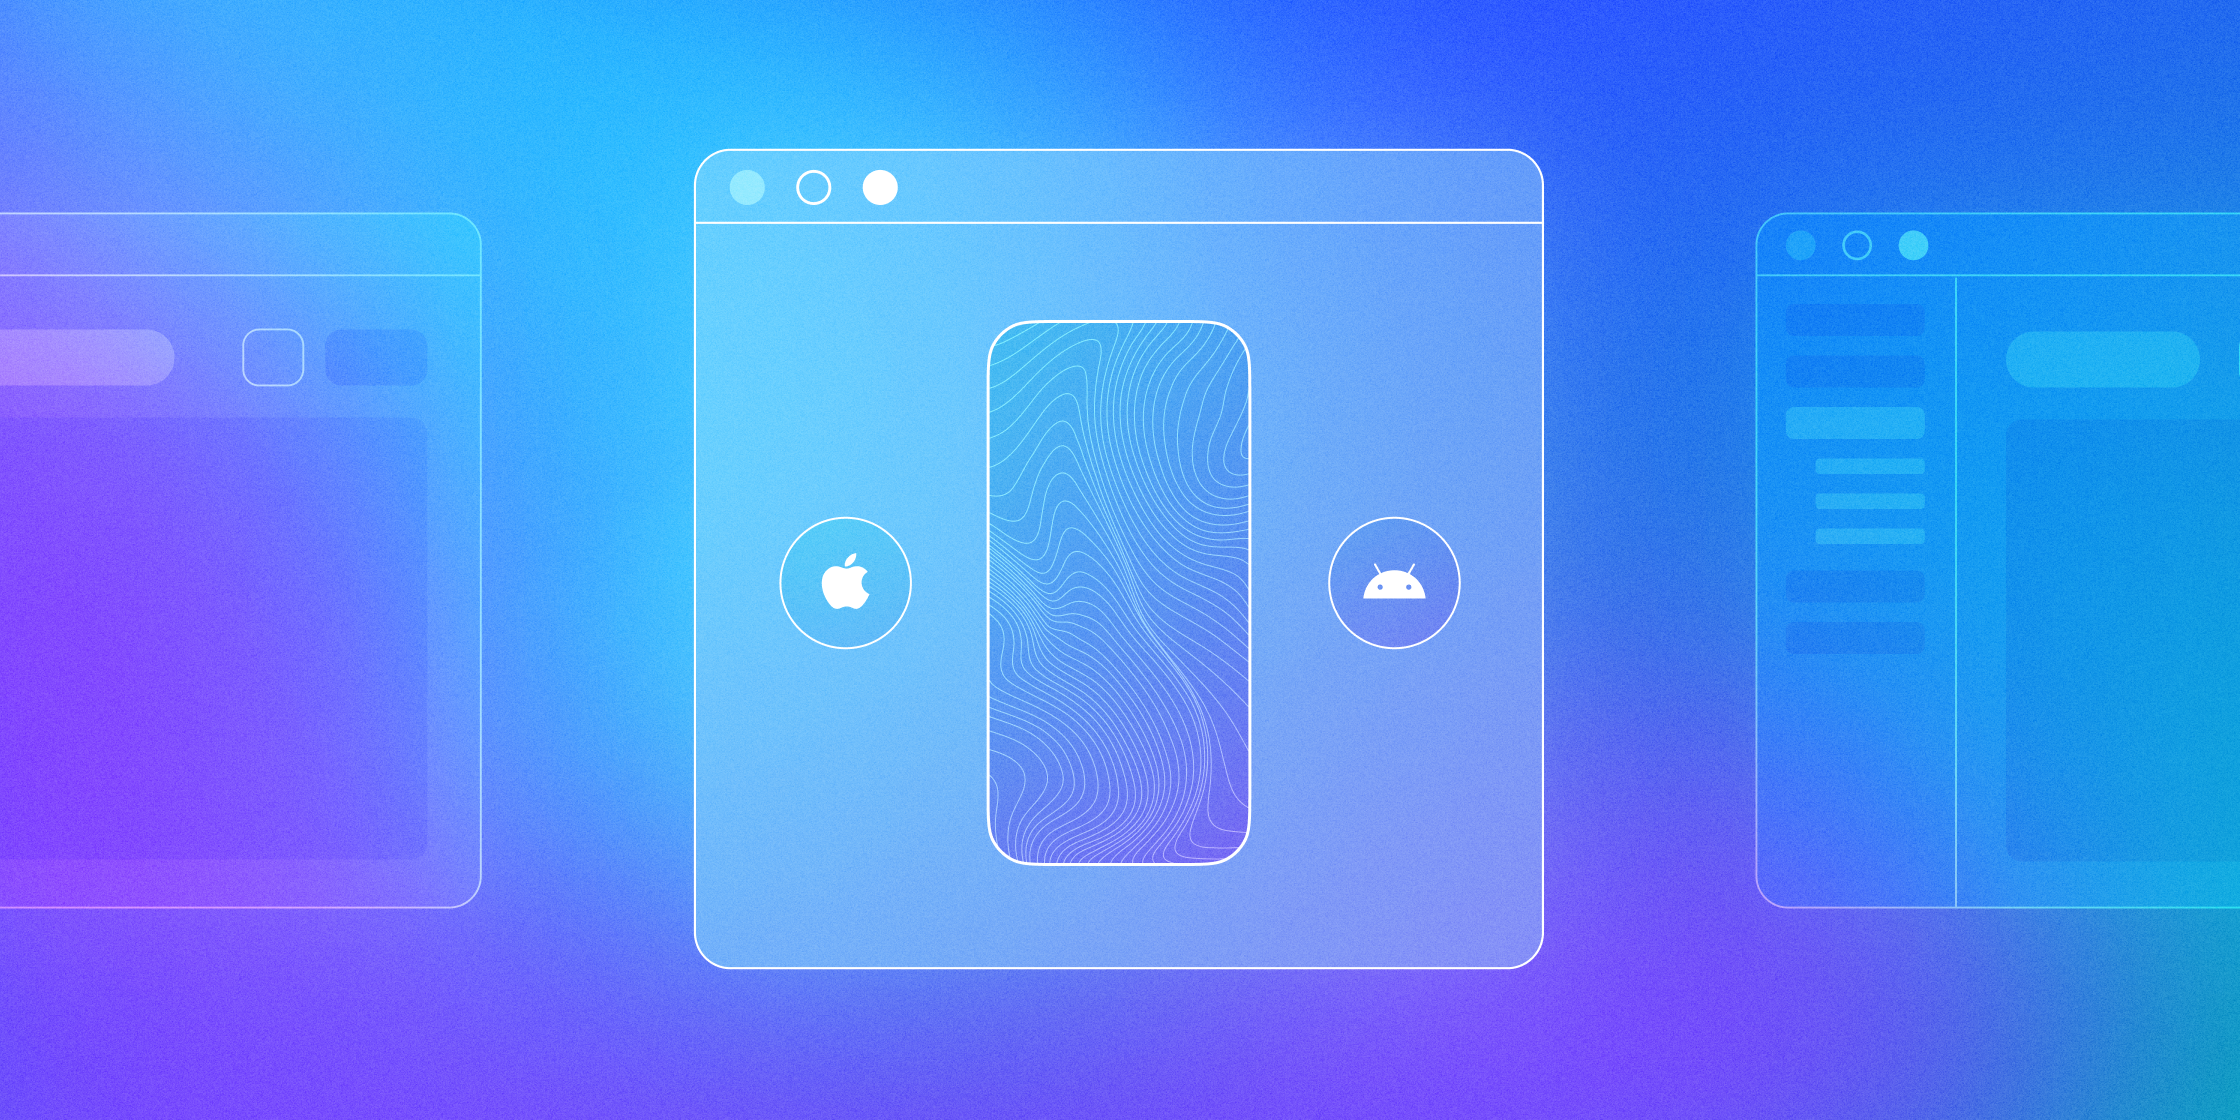
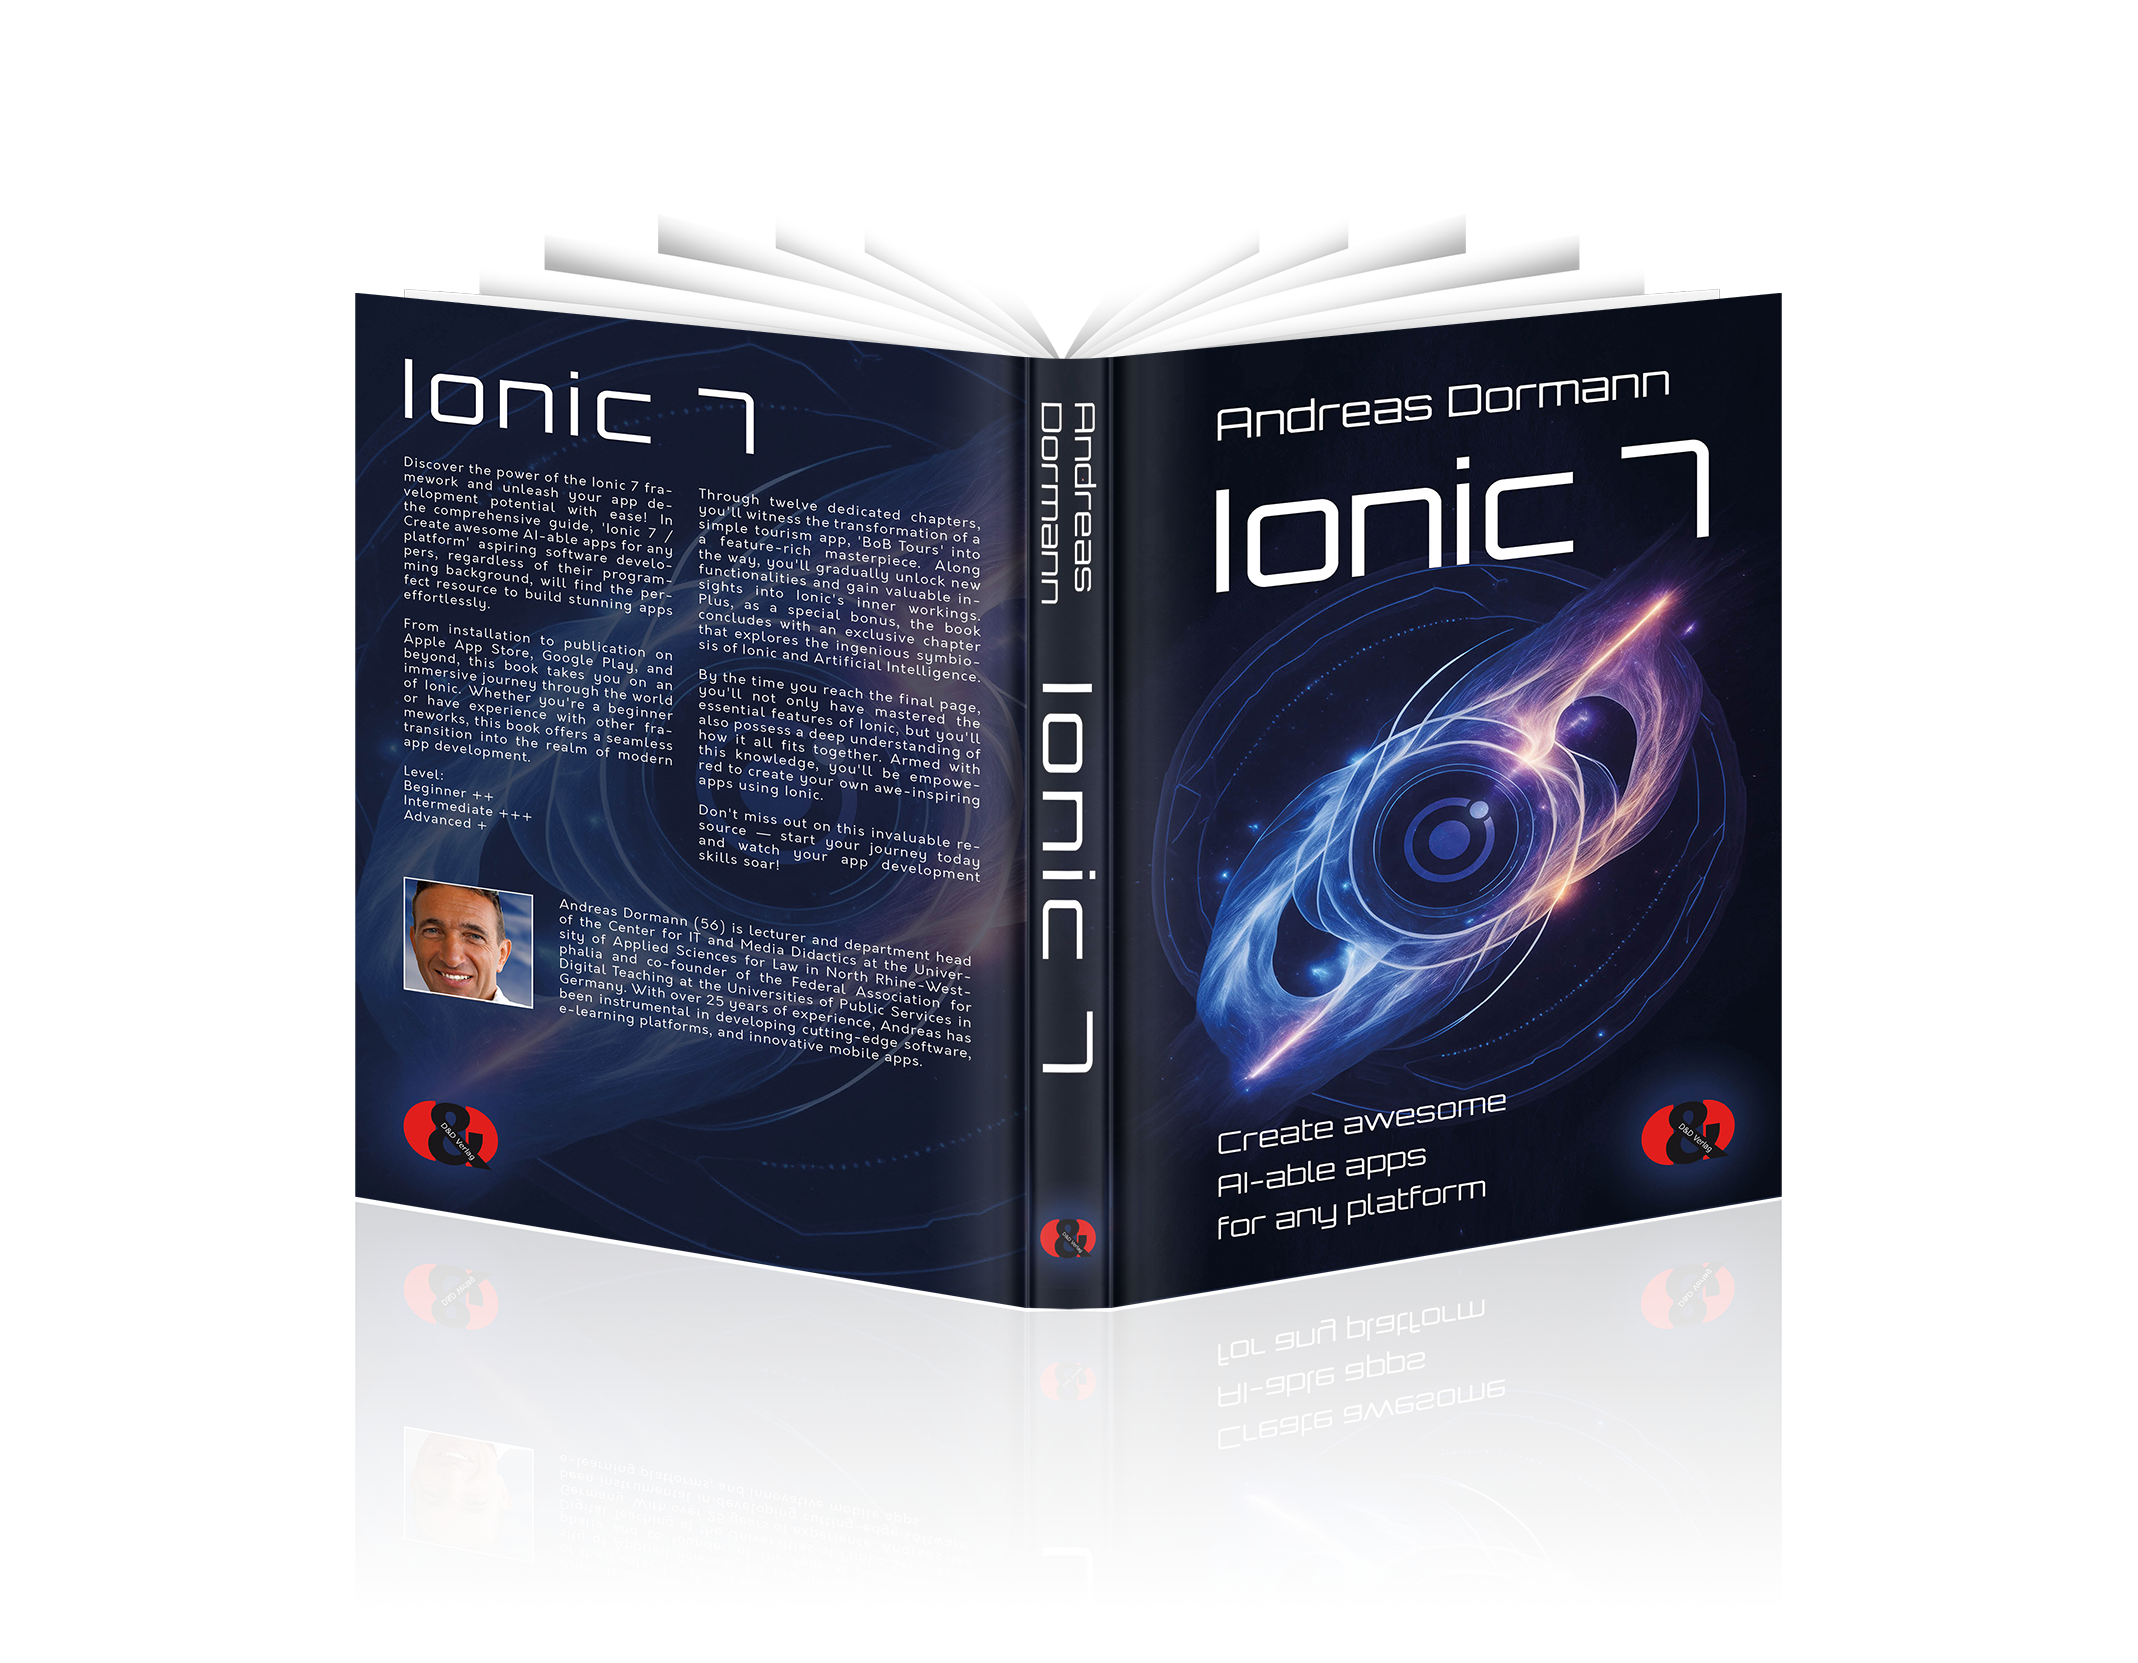
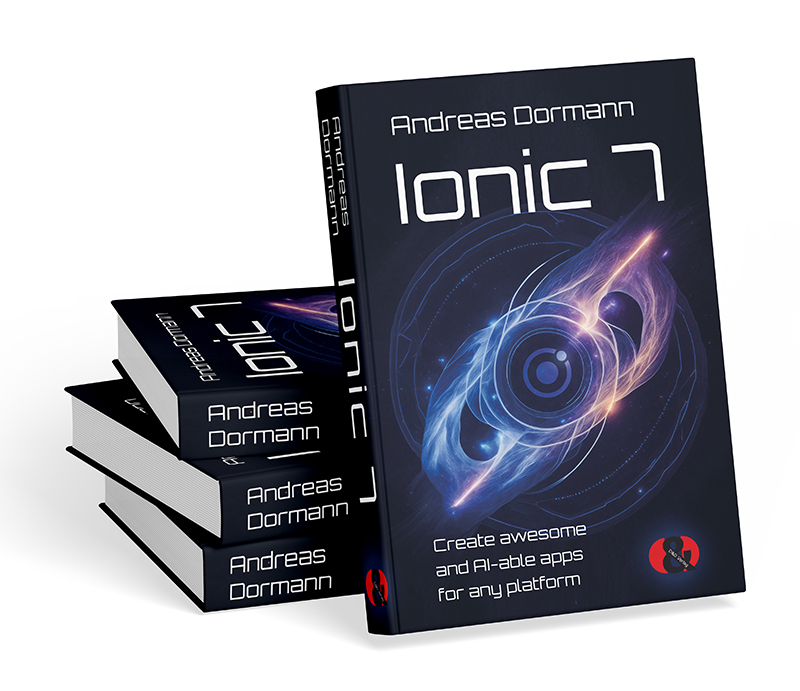
the moment we’ve all been eagerly waiting for has arrived! Brace yourselves for the launch of the most exhilarating read in the world of mobile app development – the groundbreaking “Ionic 7: Create awesome and AI-able apps for any platform!”
I proudly present to you the latest addition to the Ionic universe, where innovation knows no bounds, and creativity soars beyond the horizon. This book is not just an ordinary guide; it’s a gateway to unexplored dimensions, the final frontier of app development that will redefine how you envision and craft mobile applications.
Embark on an Adventure like No Other
Picture yourself on a journey through the vast expanse of the Ionic 7 landscape, accompanied by a seasoned guide who unveils the secrets of this powerful framework. As you turn each page, you’ll venture into strange new worlds of coding and design, leaving no stone unturned in your quest to create extraordinary mobile experiences.
Unravel the Marvels of Ionic 7
Prepare to be astounded by the sheer brilliance of the features that Ionic 7 has to offer. From seamless integrations to jaw-dropping animations, and from enhanced performance to cutting-edge UI components, this book delivers everything you need to push the boundaries of app development.
Unleash Your Creativity
With the Ionic 7 book in your hands, creativity becomes an unstoppable force. Delve into the art of crafting immersive user interfaces that captivate and engage users like never before. Unleash the potential of your imagination as you build sleek, user-friendly apps that stand out in the digital galaxy.
Become a Trailblazer
Ionic 7 isn’t just about creating ordinary apps; it’s about becoming a trailblazer in the ever-evolving landscape of mobile technology. Gain insights into the latest industry trends like A.I. and best practices that will set you miles ahead of the competition. Armed with this knowledge, you’ll be ready to boldly go where no developer has gone before!
Your Mission Begins Today!
Join us as we celebrate the launch of the Ionic 7 book, where the realms of innovation and imagination merge to create something extraordinary. It’s time to break barriers, challenge norms, and embrace the future of mobile app development!
Are you ready to embark on this thrilling adventure? Don’t wait any longer. Secure your copy of “Ionic 7: Create awesome and AI-able apps for any platform!” on AMAZON now and set sail for a universe of endless opportunities.
The future is now. Let my Ionic 7 book be your guiding star! [...]
April 29, 2023Announcement / Ionic NewsMy brand new Ionic 7 book is nearly finished and will be published in July 2023!
Have a nice day& happy coding!
Andreas [...]
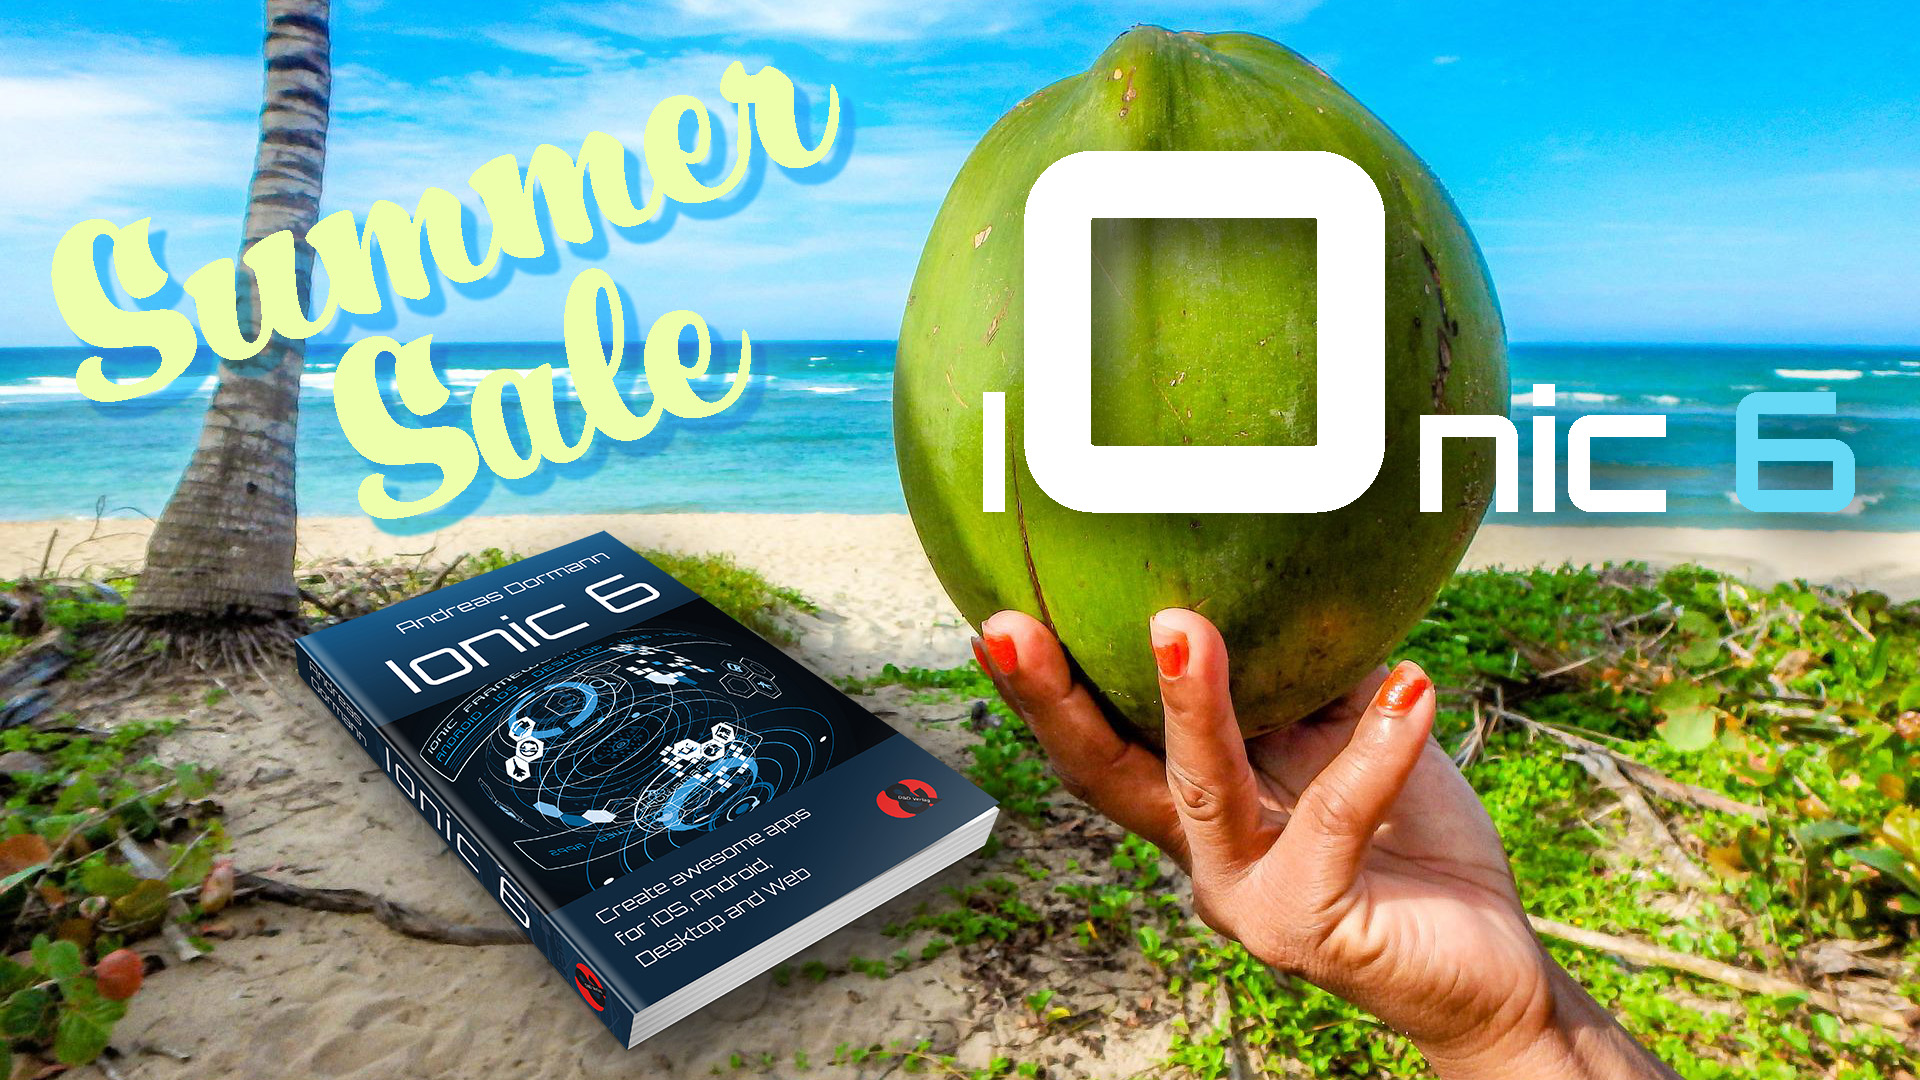
August 21, 2022Announcement / Ionic NewsMy publisher is doing a hot Summer Sale next week: And my Ionic 6 book with 500 pages full of cool know-how around app development will be a lot cheaper.eBook: $49 (not $69), Paperback: $59 (not $79), Hardcover: $69 (not $89)
Visit Amazon: https://www.amazon.com/dp/394510257X [...]
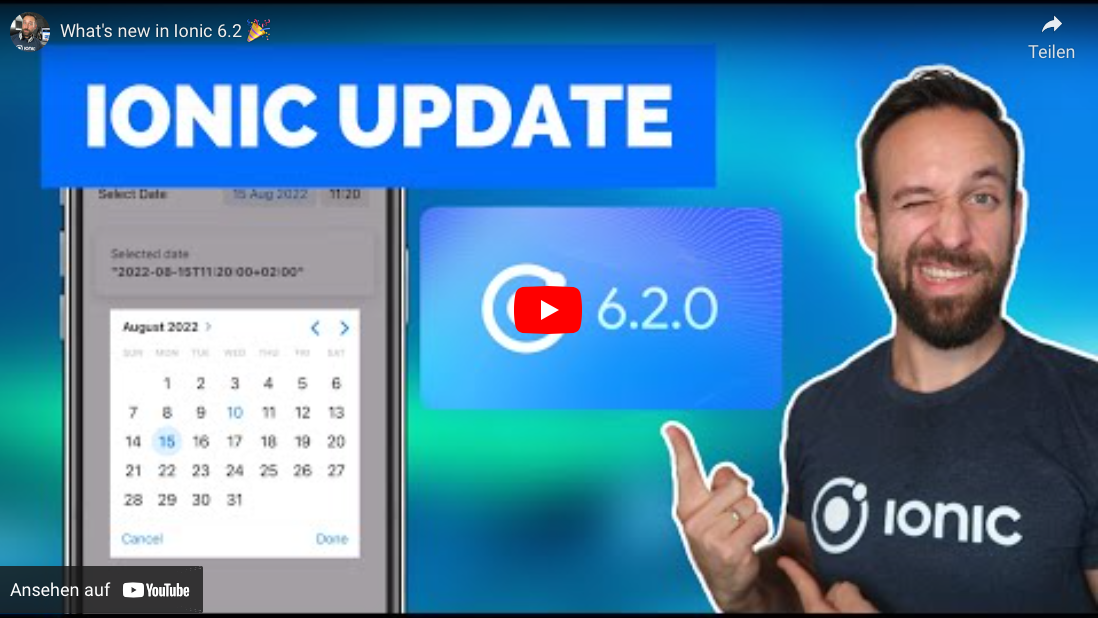
August 18, 2022Advanced Tips / Tutorial TipIonic 6.2 was released with a bunch of cool updates!
Thanks to our good friend Simon Grimm (Ionic Academy) we also get a short video tutorial that explains the new features, especially the overhauled DateTime component.
Watch & wonder:
What’s new in Ionic 6.2 by Simon Grimm [...]
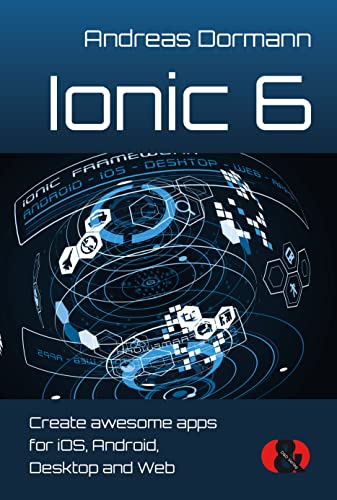
July 24, 2022AnnouncementI’m happy to present you my brand new book: „Ionic 6 – Create awesome apps for iOS, Android, Desktop & Web“ is aimed at software developers who previously had little or nothing to do with programming apps or who had worked with other tools and frameworks and would like to build cool apps in an easy way.
The book spans from the idea of the popular app framework and its installation to the realization of a complete app including its publication on Apple App Store, Google Play, for Desktop by using Electron or as Progressive Web App (PWA).
Each of the twelve chapters is dedicated to its own aspect of Ionic. In the process, new functionalities are gradually being added to an initially simply designed tourism app called „BoB Tours“.A bonus chapter gives a brief overview of how to use Ionic with React, Vue or no framework at all. In addition, the new features of Ionic 6.1 are presented.At the end of this book, the reader not only knows the key features of Ionic, but has also understood how the whole works in context. He/She finally has the necessary knowledge to be able to develop his/her own awesome apps with Ionic.
A comprehensive introduction to Ionic on more than 500 pages. [...]
March 7, 2022AnnouncementPre-order my NEW Ionic 6 book on Amazon at a much lower price! [...]
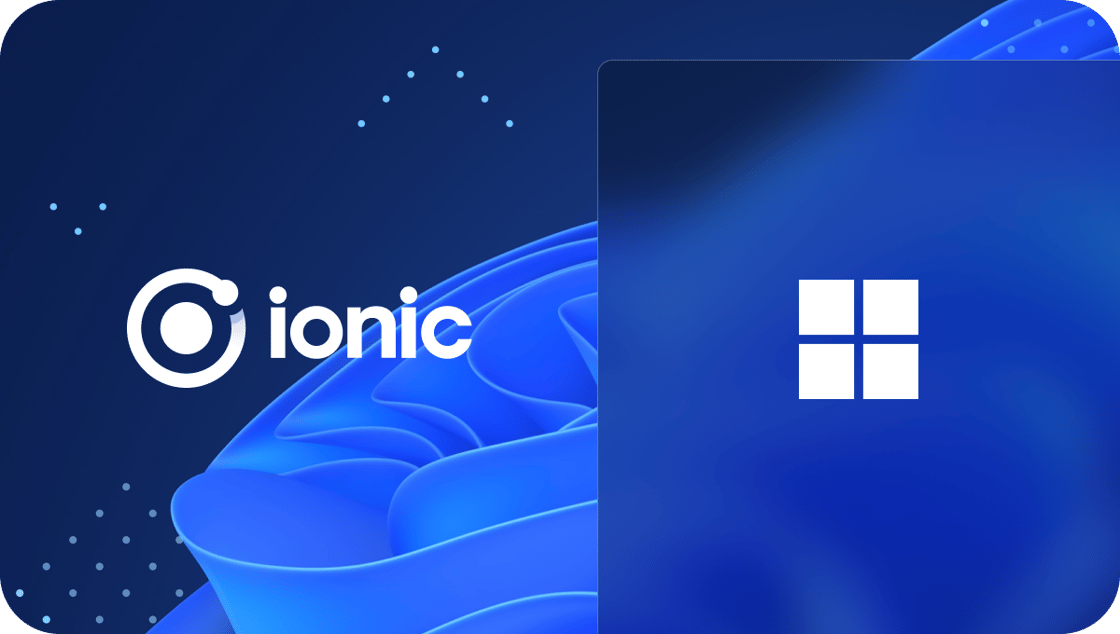
November 9, 2021Announcement / Ionic NewsThe Ionic team announces Ionic Windows.
With their new Ionic Windows solution, you can deploy truly cross-platform apps across mobile, web, and desktop — with one codebase and full native access on each platform.
Ionic Windows features:
A native Windows platform with integration into modern Windows APIs and features like those available on Microsoft Surface devices. Integration into the core Ionic developer experience with easy-to-use command line tooling and developer-friendly documentation. A single API across iOS, Android, Web, and now Windows for maximum code reuse and platform compatibility. Performance and developer experience improvements over legacy desktop approaches, such as Electron. Support for any web app stack, such as Angular, React, or Vue. The ability to extend the app with custom platform-specific functionality with a powerful and easy-to-use plugin system. Coming soon: Native plugin support for Ionic Enterprise native solutions covering single sign-on, biometric authentication, data storage, and more.Seamless integration with Ionic V6’s desktop form factors (now in beta).
Additionally, Ionic Windows comes with Ionic’s customer-loved Support and Advisory services, and is fully maintained and supported by the team of mobile and desktop app experts at Ionic.
Explore Ionic Windows [...]

October 20, 2021AnnouncementThe libraries of Ionic and Angular have changed somewhat since the book release of “Ionic 5”.
In this PDF I’ve listed all changes. [...]
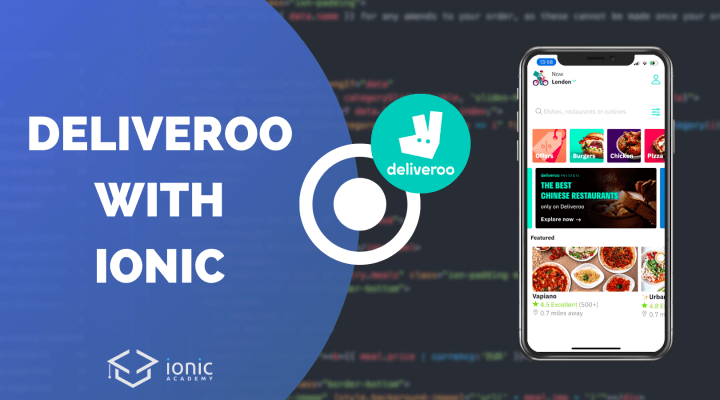
May 5, 2021Advanced Tips / Tutorial TipSimon from the Ionic Academy has finally finished a new massive #builtwithionic tutorial on his devdactic blog:
Building a Deliveroo Food Ordering UI with Ionic
If you’ve seen one of the previous tutorials of this series you know that it’s packed with hands on content about creating an awesome user interface with Ionic.
The tutorial works with different slides and a custom header animation plus the details screen with parallax image and something special to track your position inside the page and update a sticky slides component!
Like always you can also find the tutorial video on YouTube! [...]
April 9, 2021Announcement / Ionic NewsSave the date: Ioniconf 2021, June 23rd !
The Ionic team is back with an all new version of Ioniconf for 2021. Last year they held their first ever virtual conference and this year, they’re bringing it back with more topics about the Ionic ecosystem.
Here are the details:
12 sessions from the amazing community members (You?)Talks about Ionic, Capacitor, Native plugins, design, and moreAttend virtually from the comfort of your own home
Register for free [...]

January 19, 2021Announcement / Ionic NewsThe Ionic Team announces that Capacitor 3 is ready for public beta! This release includes a lot of exciting new features, including:
Individual Packages for APIs
The Core APIs provided by Capacitor have received a lot of new attention with V3. Instead of including all the plugins in the Core API, they’ve split out the plugins into their own packages. This means faster startup times and more control over required permissions.
Run your project from the CLI
A highly requested feature, you can now run your projects directly from the command line with a brand new run command. Say goodbye to context switching!
Dynamic Project Configuration
They’ve added support for having a Capacitor config file that is written in TypeScript! This means getting auto-completion for your config values, as well as the ability to support multiple build environments such as prod/dev/staging.
With the beta the Ionic Team is actively looking for your feedback. Give it a try and let them know how it works for you!
More information here:
https://capacitorjs.com/blog/announcing-capacitor-3-0-beta?utm_medium=email&_hsmi=106709447&_hsenc=p2ANqtz-9HQ-R7CuWw1BF_S9vBem6wdCkM0Eowip34OIkXlXuiu-1dSZX_98DdmMduDl6ag_Z4TOEW7cGKfUdIufUqJIMHJX8ZIK6K97ufMbbkL51sehEU0E8&utm_content=106709447&utm_source=hs_email [...]

October 16, 2020Announcement / Ionic NewsToday the Ionic team announces the general availability of Ionic Vue, a native Vue version of Ionic Framework that makes it easy to build apps for iOS, Android, and the web as a Progressive Web App (PWA) with one Vue codebase.
Check out the announcement Tweet
Ionic Vue was built to take advantage of all the great new features that shipped in Vue 3, including “improved performance, smaller bundle sizes, better TypeScript integration, new APIs for tackling large scale use cases, and a solid foundation for long-term future iterations of the Vue framework”.
Combining the benefits of both Ionic and Vue, Ionic Vue offers a great way for web developers to build fast, lightweight mobile applications in very little time, backed by a supportive worldwide community.
Here are a few highlights of what’s included with this release:
Built with Vue 3. Ionic Vue is built with Vue 3. This means that developers building with Ionic Vue will benefit from all the improvements and features in Vue 3, like the new Composition API.Vue Router Integration. We’ve created a router integration that builds on top of Vue’s router. Meaning you’ll get first class routing out of the box, as well as Ionic’s transitions and animations.Ionic CLI support. Building a new Ionic Vue project with the CLI means you’ll not only get a great app out of the box, but it will get you started with best practices already applied. [...]
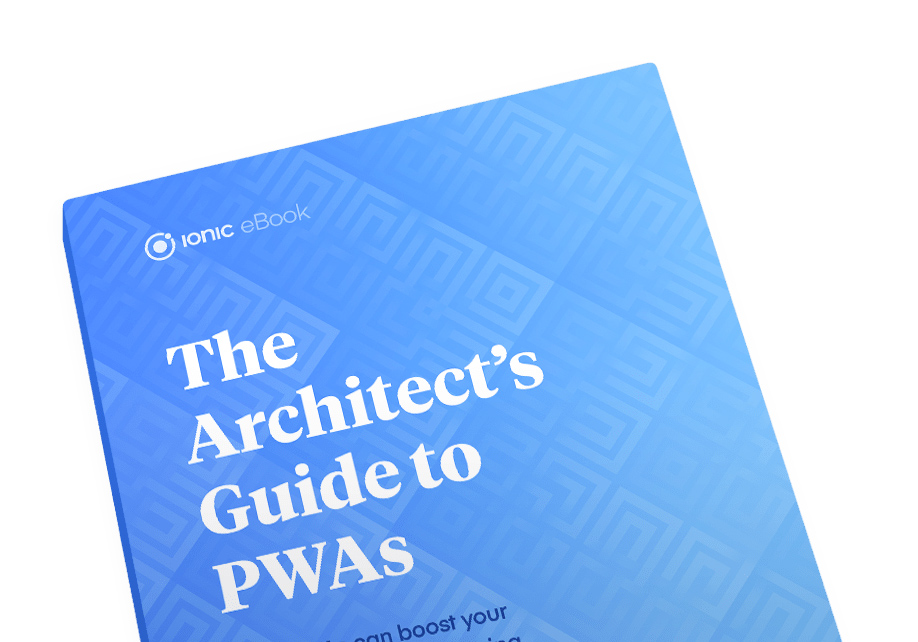
October 2, 2020Advanced Tips / TutorialBig brands like Twitter and Pinterest are demonstrating how Progressive Web Apps can boost user acquisition, engagement, and ultimately, revenue.
This guide provides enterprise architects and app dev leaders with practical insights on which projects are right for PWAs, and how to build a production-ready PWA today.
In this guide, you’ll learn:
What makes a PWA. The key capabilities and features that define PWAsHow PWAs work. An overview of the APIs and browser standards that allow PWAs to provide reliable, fast, engaging experiences with the web.How PWAs fit into your app strategy. When and why to use a PWA in favor of a traditional native mobile app.How to get started. Everything you need to get started with PWAs today.
Read the PWA Guide!
After reading this paper, be sure to check out the Ionic PWA Toolkit. It includes everything you need to build beautiful, fast, production-ready Progressive Web Apps today. [...]

September 1, 2020Announcement / Ionic NewsThe Ionic team announces a new version of Capacitor.
Like any major version change, Capacitor 3.0 will include some new features, but also some changes to how plugins are consumed. They’ve been tracking their ideas on GitHub and have created a few issues to share their plans. This covers new features and bug fixes to Capacitor-Core, as well as splitting out the plugins to their own packages.
If you want to check on the progress or find the reason for these changes, they have a main Capacitor 3.0 issue which covers this.
There are also two other issues related to plugins and upgrade guides you could also track as well:
Capacitor 3.0 plugins updatesCapacitor 3.0 upgrade guide
Also read Mike Hartington’s posts for more:
How Capacitor WorksIonic Vue Progress UpdateBuilding With Capacitor and VueNew Capacitor Community Org [...]

August 12, 2020Ionic NewsAdobe just announced that they are shuttering PhoneGap, PhoneGap Build, and their (long non-existent) investment in Apache Cordova.
As the pioneer of hybrid app development, aka web developers building mobile apps, this is truly the end of an era.
Max Lynch, co-founder of Ionic, wrote an interesting article on this latest news. Worth reading! Here is the link:
https://dev.to/ionic/saying-goodbye-to-phonegap-1gp4 [...]
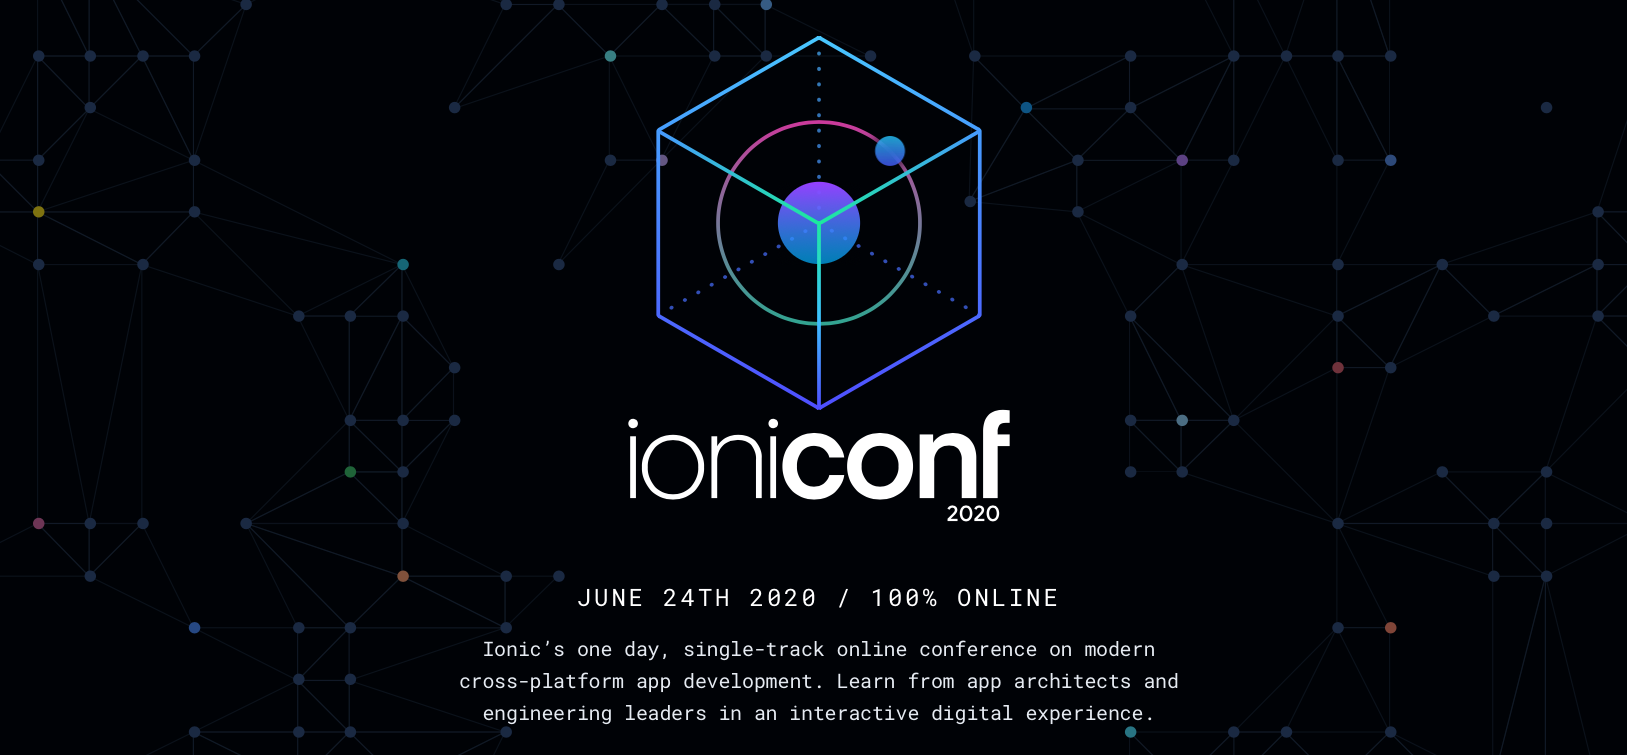
June 1, 2020Announcement / Ionic NewsIoniconf 2020 – die eintägige Online-Konferenz von Ionic zur modernen plattformübergreifenden App-Entwicklung
Ioniconf 2020 ist eine rein digitale Veranstaltung, die am 24. Juni 2020 stattfindet und bequem von zu Hause aus besucht werden kann! Das Ionic Team hat Branchenführer zusammengebracht, um alles über Ionic und die Webplattform zu teilen und das Web und die Webentwickler zu feiern.
Um mehr über die Konferenz zu erfahren, lesen Sie den neuesten Blog-Beitrag oder registrieren Sie sich einfach unten für die Konferenz.
Seien Sie gespannt auf Details zu Ioniconf 2020 in den kommenden Wochen, wenn das Ionic Team Referenten, Themen und andere aufregende Details hinzufügen wird.
Hier geht’s zur Registrierung! [...]
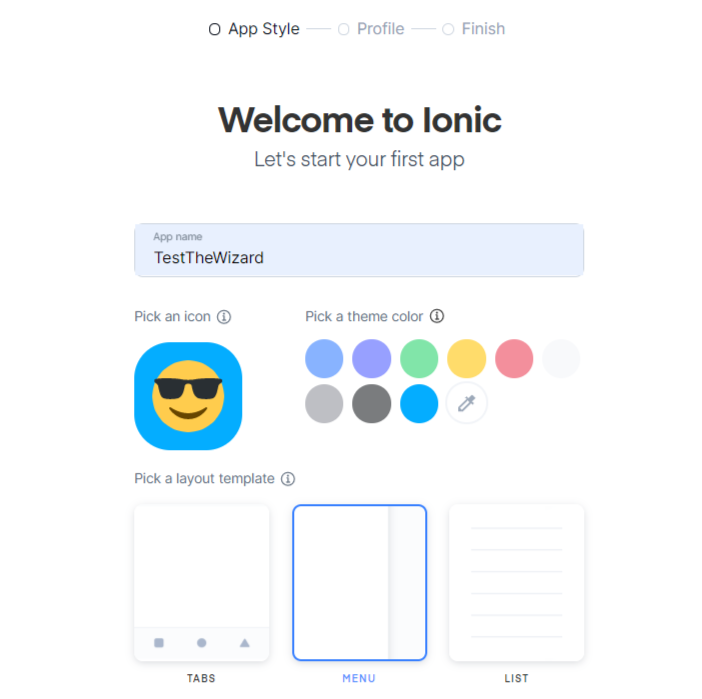
May 12, 2020Ionic NewsThe Ionic team provides a nice little App Wizard on https://ionicframework.com/.
In just a few steps, you determine the title, icon and layout of your app, pick a JavaScript Framework (React, Angular, Vue (coming soon)), create a (free) Ionic account (if not already available), and then enter only two predefined commands in the terminal.
Your Ionic app is ready! Cool. [...]

April 20, 2020Ionic NewsThe Ionic team is excited to announce the next evolution of Capacitor, Ionic’s native runtime that makes it easy to build web apps that run on iOS, Android, and on the web as Progressive Web Apps — all powered by a single codebase.
This new version updates Capacitor and its project templates to the latest security, bug fixes, and features including:
Swift 5, Android 10, & AndroidX supportFace Unlock and Iris Unlock in Ionic Identity Vault UX improvements to 23+ core pluginsImproved tooling & docsEasy update processSmaller app sizes
Capacitor 2.0 is a significant update to an increasingly important part of Ionic’s app development platform. It’s now the default for all new Ionic React projects, and soon will be for Ionic Angular projects as well.
Read more:
Announcing Capacitor 2.0 [...]
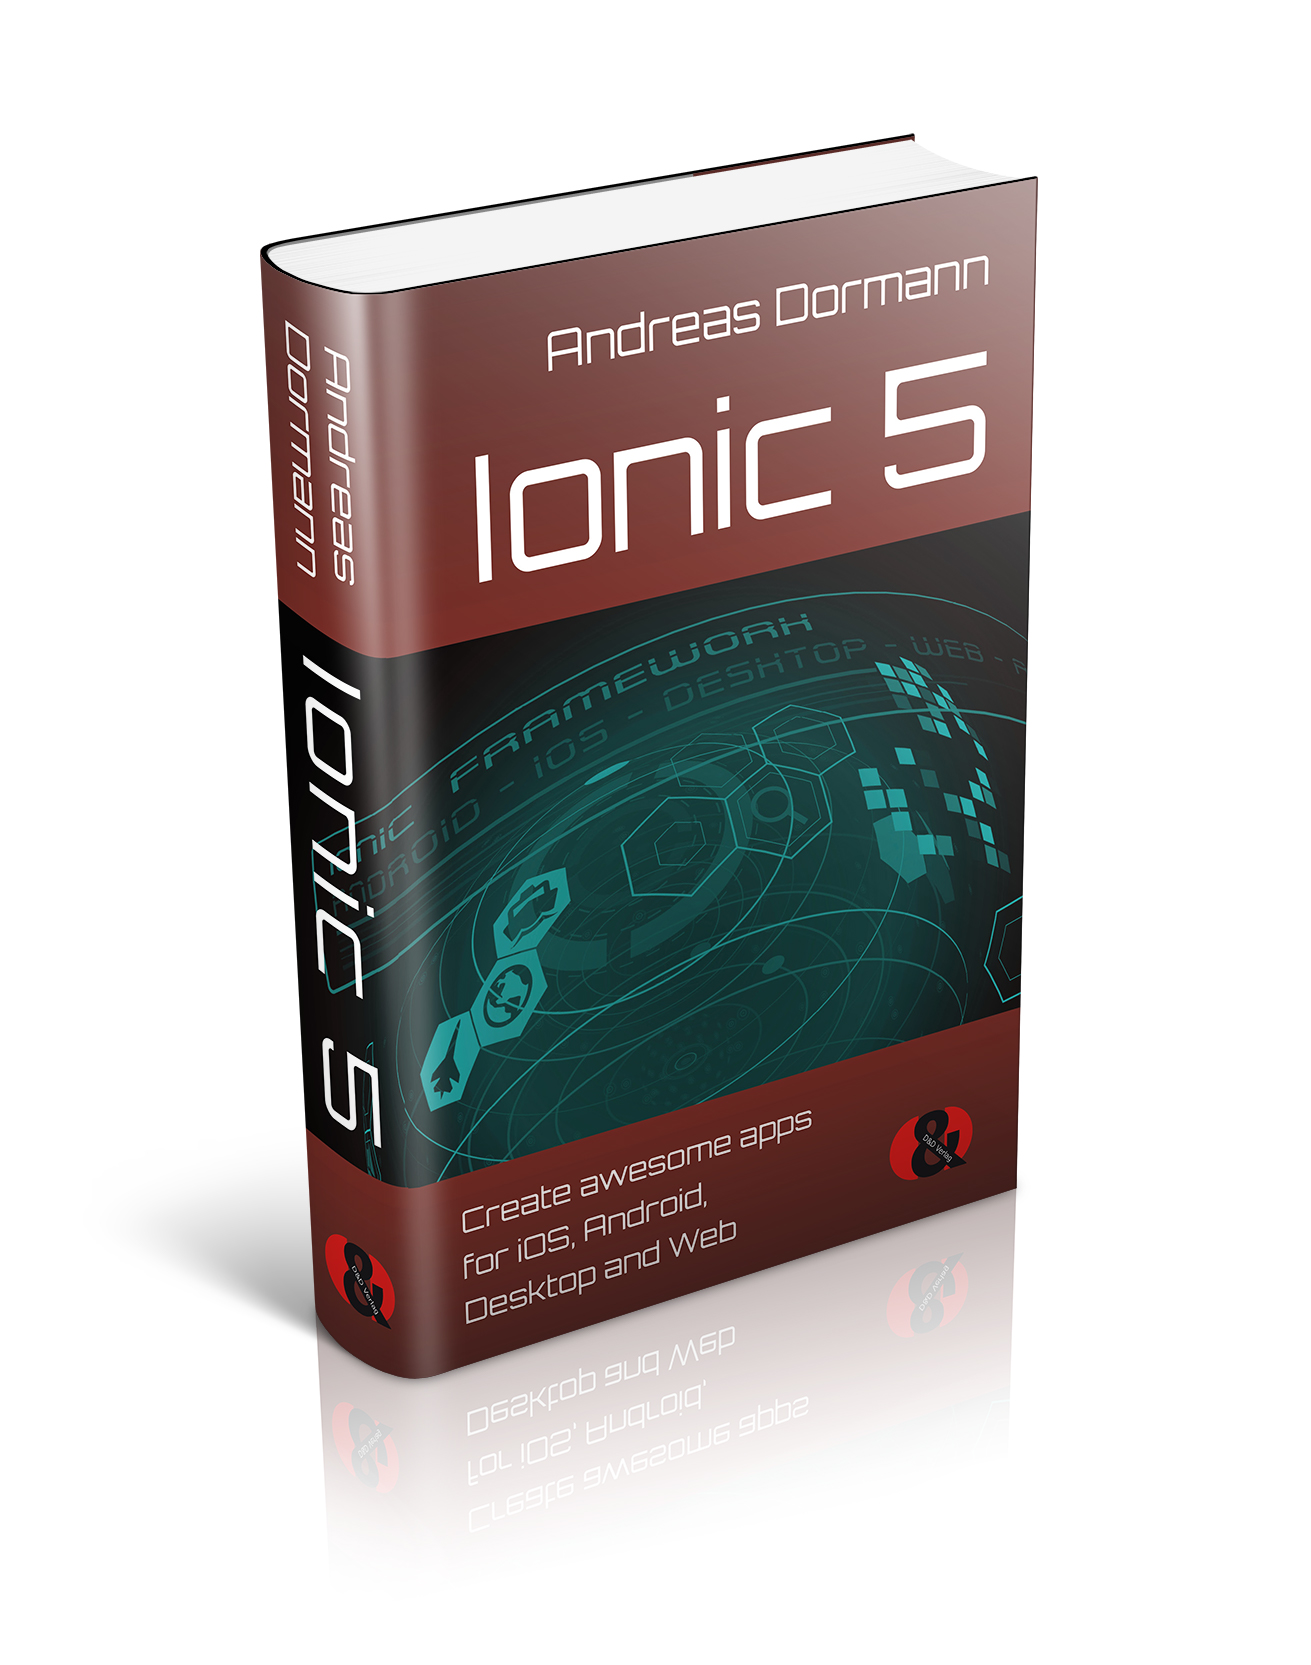
March 21, 2020AnnouncementIonic 5 / Create aweseome apps for iOS, Android, Desktop and Web.
This book is aimed at software developers who previously had little or nothing to do with programming apps or who had worked with other tools and frameworks and would like to build cool apps in an easy way.
The book spans from the idea of the popular app framework and its installation to the realization of a complete app including its publication on Apple App Store, Google Play, for Desktop by using Electron or as Progressive Web App (PWA).
Each of the twelve chapters is dedicated to its own aspect of Ionic. In the process, new functionalities are gradually being added to an initially simply designed tourism app called „BoB Tours“.
At the end of this book, the reader not only knows the key features of Ionic, but has also understood how the whole works in context. He/She finally has the necessary knowledge to be able to develop his/her own awesome apps with Ionic.
At this website you’ll find all source code we write in this book – to every chapter the respective development progress – always up to date! You can download it from the download area here and compare it to your own code or use it as a base to start from whatever chapter you want.
Ionic 5 / Create aweseome apps for iOS, Android, Desktop and Web is a comprehensive introduction to the Ionic framework on more than 600 pages.
Level: Beginner ++ | Intermediate +++ | Advanced +
Table of Contents:
1. Introduction 2. Angular Essentials3. The first app4. Navigation5. Services and Storages6. UI Components7. Form validation8. Theming, styling, customizing9. Ionic Native10. Communication and Messaging11. Debugging and Testing12. Build, Deploy and Publish
Bonus chapters:
B1. Ionic without any frameworkB2. Ionic and CapacitorB3. Ionic and ReactB4. Ionic and Vue
Get it now on Amazon! [...]

February 12, 2020Announcement / Ionic NewsIonic Framework 5 (Magnesium) is out today!
This release includes iOS 13 design updates, a brand new API for creating your own custom animations, revamped Ionicons, updated Ionic colors, new starter designs, improvements to component customization, and more!
You may be concerned about the upgrade process due to the fact that this is a major version release, but fret not! The Ionic team migrated to follow the semantic versioning convention and committed themselves to publish a major release when any known incompatible API changes were introduced. So in this case, the major version just indicates that their public API has been updated. And because they now use Web Components, API changes are handled separately between their UI components and the JavaScript framework.
Long story short: for those on v4, this upgrade should be easy.
And my new Ionic 5 book will follow soon!
To dive in and see what’s new, read Brandy’s announcing blog article! [...]

December 22, 2019TutorialThis is part 4 of an Ionic 4 tutorial. Please read part 1, part 2 and part 3 before continuing here…
Part 4: Make it sound x-massy
To let our app sound x-massy, I’ve prepared some audio files that you can download here:SantaClausIsComing.mp3Hohoho.mp3
After downloading the files copy them into the assets folder.
Embed audio
There are various ways of integrating audio in an app. We make it easy with the howler.js library.
Install howler.js in the terminal with
$ npm install howler
Then we create a service with
$ ionic g service services/audio
In the new audio.service.ts we code the following lines:
import { Injectable } from '@angular/core';
import { Howl } from 'howler';
@Injectable({
providedIn: 'root'
})
export class AudioService {
private hohoho: Howl;
constructor() { }
Init() {
new Howl({
src: ['../assets/SantaClausIsComing.mp3'],
preload: true,
autoplay: true,
loop: true
});
this.hohoho = new Howl({
src: ['../assets/Hohoho.mp3'],
preload: true,
autoplay: false,
loop: false
});
}
SayHohoho() {
this.hohoho.play();
}
}
Now we can import and initialize this service in home.page.ts:
import { Component } from '@angular/core';
import { AudioService } from '../services/audio.service';
import { GameService } from '../services/game.service';
@Component({
selector: 'app-home',
templateUrl: 'home.page.html',
styleUrls: ,
})
export class HomePage {
constructor(
public audio: AudioService,
public game: GameService
) { }
ngOnInit() {
this.audio.Init();
this.game.Start();
}
}
Since our SantaClausIsComing song was configured with the parameter autoplay: true, the song starts already, as soon as the app is restarted.
Trigger audio in a specific situation
With howler.js it’s easy to trigger a sound to a certain event.
In our app it makes sense that Santa calls “hohoho!” when he picks up one of the presents.
So we go to our game.service.ts file and add the highlighted lines:
import { Injectable } from '@angular/core';
import { MazeService } from '../services/maze.service';
import { MazePosition } from 'src/app/models/maze-position';
import { ToastController } from '@ionic/angular';
import { AudioService } from '../services/audio.service';
import { Router } from '@angular/router';
@Injectable({
providedIn: 'root'
})
export class GameService {
public status: string;
/** player: position */
private playerPosition: MazePosition = new MazePosition(0, 7);
/** items: positions */
private itemPresent1 = new MazePosition(7, 1);
private itemPresent2 = new MazePosition(8, 15);
private itemPresent3 = new MazePosition(12, 8);
/** items: collected */
private hasPresent1: boolean = false;
private hasPresent2: boolean = false;
private hasPresent3: boolean = false;
constructor(
private audio: AudioService,
private maze: MazeService,
private toastController: ToastController
) { }
/**
* Starts the game.
*/
public async Start() {
this.maze.Init(16, 16);
this.initPlayer();
}
/**
* Navigates with the arrow keys or WASD.
*
* @param keydownEvent.code event code coming from keydown
*/
public Navigate(keypressEvent) {
switch (keypressEvent) {
case 'ArrowUp':
case 'KeyW':
if (this.maze.CanMoveUp(this.playerPosition)) {
this.movePlayer(this.playerPosition.Col, this.playerPosition.Row - 1);
}
break;
case 'ArrowLeft':
case 'KeyA':
if (this.maze.CanMoveLeft(this.playerPosition)) {
this.movePlayer(this.playerPosition.Col - 1, this.playerPosition.Row);
} else {
}
break;
case 'ArrowDown':
case 'KeyS':
if (this.maze.CanMoveDown(this.playerPosition)) {
this.movePlayer(this.playerPosition.Col, this.playerPosition.Row + 1);
}
break;
case 'ArrowRight':
case 'KeyD':
if (this.maze.CanMoveRight(this.playerPosition)) {
this.movePlayer(this.playerPosition.Col + 1, this.playerPosition.Row);
}
break;
}
}
private initPlayer() {
this.movePlayer(this.playerPosition.Col, this.playerPosition.Row);
}
private movePlayer(col: number, row: number) {
if (row < 0) {
this.presentToast('Hey!', 'What kind of unreliable Santa are you?');
}
else if (row < this.maze.Rows) {
this.moveSection('santa',
col * (this.maze.CellPixels),
row * (this.maze.CellPixels)
);
this.playerPosition = new MazePosition(row, col);
this.checkForItemHits();
} else {
if (!this.hasPresent1 || !this.hasPresent2 || !this.hasPresent3) {
this.presentToast('Hey!', 'You haven\'t found all the presents yet, Santa!');
} else {
this.audio.SayHohoho();
this.presentToast('Ho ho ho!', 'You\'ve found all the presents, Santa!\nChristmas can come now ;-)');
}
}
}
private moveSection(elementName: string, xOffset, yOffset) {
var element = document.getElementById(elementName);
if (element) {
var transformAttr = ' translate(' + xOffset + ',' + yOffset + ')';
element.setAttribute('transform', transformAttr);
}
}
private checkForItemHits() {
if (this.playerPosition.Col == this.itemPresent1.Col
&& this.playerPosition.Row == this.itemPresent1.Row) {
this.hasPresent1 = true;
this.audio.SayHohoho();
this.presentToast('Hey!', 'You\'ve found present 1, Santa!');
this.hide('present1');
}
if (this.playerPosition.Col == this.itemPresent2.Col
&& this.playerPosition.Row == this.itemPresent2.Row) {
this.hasPresent2 = true;
this.audio.SayHohoho();
this.presentToast('Hey!', 'You\'ve found present 2, Santa!');
this.hide('present2');
}
if (this.playerPosition.Col == this.itemPresent3.Col
&& this.playerPosition.Row == this.itemPresent3.Row) {
this.hasPresent3 = true;
this.audio.SayHohoho();
this.presentToast('Hey!', 'You\'ve found present 3, Santa!');
this.hide('present3');
}
}
private hide(elementName: string) {
var element = document.getElementById(elementName);
element.style.display = "none";
}
private async presentToast(header: string, message: string) {
const toast = await this.toastController.create({
header: header,
message: message,
duration: 5000,
position: 'top'
});
await toast.present();
}
}
So, give it a try and be happy with Santa when he finds the presents in the maze and finally the exit 😉
Improvements
There is of course a lot of room for improvement in this gaming app:
A nice sound when Santa takes a step and/or another sound when he hits a wall. And other characters (bots) that make life difficult for Santa because they also chase after the gifts and snap them away from him. And so on…
Feel free to implement further features and share them with us!
Credits
Without the great graphics, tools and audio files, which are available free of charge on the web, I would have had to spend a lot more time on this app. Therefore I would like to finally thank:
mazegenerator.netWith this amazing tool you can generate all kinds of labyrinths … and export them as SVG!freepik.comThis is where the pretty decoration, our Santa and the presents come from. Thanks to kipargeter for this!soundcloud.comThe song “Santa Claus is coming” is by Andi del Mar and is freely available on SoundCloud.
I hope you enjoyed this tutorial and you’ve found some inspiration for your own awesome apps. You want more of this cool stuff? Then look at my Ionic 4 book.
Happy reading and coding! [...]
December 15, 2019TutorialThis is part 3 of a special X-mas Ionic 4 tutorial. Please read part 1 and part 2 before continuing here…
Part 3: Make it move nicely
Animate the decoration
The easiest way to bring some animation into our app is to use Animate.css.
In the header section of our index.html we add:
<!-- Animate -->
<link rel="stylesheet" type="text/css"
href="https://cdnjs.cloudflare.com/ajax/libs/animate.css/3.7.2/animate.min.css">
Now we switch to decoration.component.html and look for a few stars there. Search for the elements with the id “star1” and add a class attribute with the values “animated flash slower infinite delay-1s”. That means: animate this star with the flash effect at a slower speed and let this animation last indefinitely. Start the whole thing with a 1s delay.
<g id="star1" class="animated flash slower infinite delay-1s">
<path class="cls-0" d="M256.4,175.4q0,36-.1,0c-.1,19.6-.3,26.6-.9,30.1-2.4-.4-4.9-2.8-9.2-7.1,4.2,4.1,6.5,6.7,7.1,8.9-3.8.7-11.2.8-33.1,1q39.3,0,0,.1c21.9.1,29.4.3,33.1.9-.5,2.3-2.9,4.9-7.1,9.1,4.3-4.3,6.8-6.7,9.2-7.2.6,3.5.8,10.3.9,30.4q.1-36,.1,0c.2-20,.3-26.8.9-30.3,2.3.6,4.8,3,8.9,7.1-4.2-4.2-6.6-6.7-7.1-9,3.7-.7,11-.9,33.2-1-26.2-.1-26.2-.2,0-.1-22.2-.2-29.5-.4-33.2-1,.6-2.3,2.9-4.8,7.1-8.9-4.1,4.1-6.6,6.4-8.9,7C256.7,201.9,256.6,194.9,256.4,175.4Z" transform="translate(0 -1)" />
<path class="cls-0" d="M244.3,220.2l1.9-1.8Z" transform="translate(0 -1)" />
<path class="cls-0" d="M244.3,196.5l1.9,1.9Z" transform="translate(0 -1)" />
<path class="cls-0" d="M268,220.2l-1.8-1.8Z" transform="translate(0 -1)" />
<path class="cls-0" d="M268,196.5l-1.8,1.9Z" transform="translate(0 -1)" />
</g>
Now add the same animation to “star2”, “star3”, “star4” and “star5”; change the delay to delay-2s, delay-3s, delay-4s and delay-5s.
Your Christmas decoration stars are now flashing great, aren’t they?
Let it snow
But what would Christmas be without snow? So let it snow!
In the assets folder create a file called snow.js with the following code:
// Amount of Snowflakes
var snowMax = 36;
// Snowflake Colours
var snowColor = ;
// Snow Entity
var snowEntity = "❄";
// Falling Velocity
var snowSpeed = 0.5;
// Minimum Flake Size
var snowMinSize = 12;
// Maximum Flake Size
var snowMaxSize = 24;
// Refresh Rate (in milliseconds)
var snowRefresh = 20;
// Additional Styles
var snowStyles = "cursor: default; -webkit-user-select: none; -moz-user-select: none; -ms-user-select: none; -o-user-select: none; user-select: none;";
/*
// End of Configuration
// ----------------------------------------
// Do not modify the code below this line
*/
var snow = [],
pos = [],
coords = [],
lefr = [],
marginBottom,
marginRight;
function randomise(range) {
rand = Math.floor(range * Math.random());
return rand;
}
function initSnow() {
var snowSize = snowMaxSize - snowMinSize;
marginBottom = document.body.scrollHeight - 5;
marginRight = document.body.clientWidth - 15;
for (i = 0; i <= snowMax; i++) {
coords = 0;
lefr = Math.random() * 15;
pos = 0.03 + Math.random() / 10;
snow = document.getElementById("flake" + i);
snow.style.fontFamily = "inherit";
snow.size = randomise(snowSize) + snowMinSize;
snow.style.fontSize = snow.size + "px";
snow.style.color = snowColor;
snow.style.zIndex = 2000 + i;
snow.sink = snowSpeed * snow.size / 5;
snow.posX = randomise(marginRight - snow.size);
snow.posY = randomise(2 * marginBottom - marginBottom - 2 * snow.size);
snow.style.left = snow.posX + "px";
snow.style.top = snow.posY + "px";
}
moveSnow();
}
function resize() {
marginBottom = document.body.scrollHeight - 5;
marginRight = document.body.clientWidth - 15;
}
function moveSnow() {
for (i = 0; i <= snowMax; i++) {
coords += pos;
snow.posY += snow.sink;
snow.style.left = snow.posX + lefr * Math.sin(coords * .3) + "px";
snow.style.top = snow.posY + "px";
if (snow.posY >= marginBottom - 2 * snow.size || parseInt(snow.style.left) > (marginRight - 3 * lefr)) {
snow.posX = randomise(marginRight - snow.size);
snow.posY = 0;
}
}
setTimeout("moveSnow()", snowRefresh);
}
for (i = 0; i <= snowMax; i++) {
document.write("<span id='flake" + i + "' style='" + snowStyles + "position:absolute;top:-" + snowMaxSize + "'>" + snowEntity + "</span>");
}
window.addEventListener('resize', resize);
window.addEventListener('load', initSnow);
The snow.js code comes from the Australian programmer and designer Kurisu Brooks and can be found under the MIT license at https://www.cssscript.com/minimalist-falling-snow-effect-with-pure-javascript-snow-js/. I modified it a little for our app.
We embed the script – as before the reference to Animate.css – in the header area of our index.html:
<!-- Snow -->
<script src="assets/snow.js"></script>
That’s it! Now it snows.
Moving Santa
Now to Santa! We want to use the arrow keys and the letters W, A, S and D to move him through the maze.
Think of the maze as a grid with 16×16 cells. When navigating, each cell must be checked to determine whether it has a wall on the left, top, right or bottom. Only when there’s no wall Santa can turn left, go upstairs, right or downstairs.
To implement this logic, we create a maze service.
In the terminal we enter the following:
$ ionic g service services/maze
The Ionic CLI then generates a services folder and a file called maze.service.ts in it, which we edit as follows:
import { Injectable } from '@angular/core';
import { MazeCell } from 'src/app/models/maze-cell';
import { MazePosition } from 'src/app/models/maze-position';
@Injectable({
providedIn: 'root'
})
export class MazeService {
public Rows: number;
public Cols: number;
public CellPixels: number;
private cellMatrix = ];
constructor() { }
public Init(rows: number, cols: number) {
this.cellMatrix = this.getCellMatrix(rows, cols);
}
private getCellMatrix(rows: number, cols: number) {
const svg = document.getElementById('maze-svg');
const viewBox = svg.getAttribute('viewBox');
const viewBoxPixels: number = parseFloat(viewBox.split(' ')) - 1;
const maze = document.getElementById('maze');
this.Rows = rows;
this.Cols = cols;
this.CellPixels = viewBoxPixels / this.Rows;
let cellMatrix = this.getEmptyCellMatrix(this.Rows, this.Cols);
// Loop over all line elements (children).
for (let i = 0; i < maze.children.length; i++) {
// Grab line elements
let x1 = parseFloat(maze.children.getAttribute('x1'));
let x2 = parseFloat(maze.children.getAttribute('x2'));
let y1 = parseFloat(maze.children.getAttribute('y1'));
let y2 = parseFloat(maze.children.getAttribute('y2'));
// Starting position
let row: number = Math.round(y1 / this.CellPixels);
let col: number = Math.round(x1 / this.CellPixels);
let isVerticalLine: boolean = (x1 == x2);
let isHorizontalLine: boolean = (y1 == y2);
// Vertical line
if (isVerticalLine) {
let rows: number = Math.round((y2 - y1) / this.CellPixels);
let isFirstCol: boolean = (col == 0);
let isLastCol: boolean = (col == this.Cols);
// Set 'left' in current col.
if (!isLastCol) {
for (let r = row; r < row + rows; r++) {
let cell: MazeCell = cellMatrix;
cell.BorderLeft = 1;
}
}
// Set 'right' in previous col.
if (!isFirstCol) {
for (let r = row; r < row + rows; r++) {
let cell: MazeCell = cellMatrix;
cell.BorderRight = 1;
}
}
}
// Horizontal line
if (isHorizontalLine) {
let cols: number = Math.round((x2 - x1) / this.CellPixels);
let isFirstRow: boolean = (row == 0);
let isLastRow: boolean = (row == this.Cols);
// Set 'top' in current row.
if (!isLastRow) {
for (let c = col; c < col + cols; c++) {
let cell: MazeCell = cellMatrix;
cell.BorderTop = 1;
}
}
// Set 'bottom' in previous row.
if (!isFirstRow) {
for (let c = col; c < col + cols; c++) {
let cell: MazeCell = cellMatrix;
cell.BorderBottom = 1;
}
}
}
} // End loop over all line elements.
return cellMatrix;
}
private getEmptyCellMatrix(rows: number, cols: number): any {
let cellMatrix = ];
for (let r = 0; r < rows; r++) {
cellMatrix = [];
for (let c = 0; c < cols; c++) {
cellMatrix = new MazeCell();
}
}
return cellMatrix;
}
public CanMoveLeft(pos: MazePosition) {
var cell: MazeCell = this.cellMatrix;
return cell.BorderLeft == 0;
}
public CanMoveUp(pos: MazePosition) {
var cell: MazeCell = this.cellMatrix;
return cell.BorderTop == 0;
}
public CanMoveRight(pos: MazePosition) {
var cell: MazeCell = this.cellMatrix;
return cell.BorderRight == 0;
}
public CanMoveDown(pos: MazePosition) {
var cell: MazeCell = this.cellMatrix;
return cell.BorderBottom == 0;
}
}
Regarding the code: We take advantage of the fact that the SVG graphic encodes the “cell walls” as line elements (see our maze.component.html). We can identify these as vertical or horizontal “walls” reading the attributes x1, x2, y1, y2. In this way, we summarize the maze in a structured manner as CellMatrix. On this basis, our service can now provide the public methods CanMoveLeft, CanMoveUp, CanMoveRight and CanMoveDown.
What is still missing are the model classes MazePosition and MazeCell imported in lines 2 and 3.
Here the code of app/models/maze-cell.ts:
export class MazeCell {
public BorderLeft: number = 0;
public BorderTop: number = 0;
public BorderRight: number = 0;
public BorderBottom: number = 0;
constructor(bLeft?: number, bTop?: number, bRight?: number, bBottom?: number) {
if (bLeft != null) {
this.BorderLeft = bLeft;
}
if (bTop != null) {
this.BorderTop = bTop;
}
if (bRight != null) {
this.BorderRight = bRight;
}
if (bBottom != null) {
this.BorderBottom = bBottom;
}
}
}
And here the code of app/models/maze-position.ts:
export class MazePosition {
public Row: number;
public Col: number;
constructor(row: number, col: number) {
this.Row = row;
this.Col = col;
}
}
Last but not least, we now have to teach Santa to walk. For this we create the GameService.
In the terminal we enter the following:
$ ionic g service services/game
The Ionic CLI then generates a file called game.service.ts in the services folder and , which we edit as follows:
import { Injectable } from '@angular/core';
import { MazeService } from '../services/maze.service';
import { MazePosition } from 'src/app/models/maze-position';
import { ToastController } from '@ionic/angular';
@Injectable({
providedIn: 'root'
})
export class GameService {
public status: string;
/** player: position */
private playerPosition: MazePosition = new MazePosition(0, 7);
/** items: positions */
private itemPresent1 = new MazePosition(7, 1);
private itemPresent2 = new MazePosition(8, 15);
private itemPresent3 = new MazePosition(12, 8);
/** items: collected */
private hasPresent1: boolean = false;
private hasPresent2: boolean = false;
private hasPresent3: boolean = false;
constructor(
private maze: MazeService,
private toastController: ToastController,
) { }
/**
* Starts the game.
*/
public async Start() {
this.maze.Init(16, 16);
this.initPlayer();
}
/**
* Navigates with the arrow keys or WASD.
*
* @param keydownEvent.code event code coming from keydown
*/
public Navigate(keypressEvent) {
switch (keypressEvent) {
case 'ArrowUp':
case 'KeyW':
if (this.maze.CanMoveUp(this.playerPosition)) {
this.movePlayer(this.playerPosition.Col, this.playerPosition.Row - 1);
}
break;
case 'ArrowLeft':
case 'KeyA':
if (this.maze.CanMoveLeft(this.playerPosition)) {
this.movePlayer(this.playerPosition.Col - 1, this.playerPosition.Row);
} else {
}
break;
case 'ArrowDown':
case 'KeyS':
if (this.maze.CanMoveDown(this.playerPosition)) {
this.movePlayer(this.playerPosition.Col, this.playerPosition.Row + 1);
}
break;
case 'ArrowRight':
case 'KeyD':
if (this.maze.CanMoveRight(this.playerPosition)) {
this.movePlayer(this.playerPosition.Col + 1, this.playerPosition.Row);
}
break;
}
}
private initPlayer() {
this.movePlayer(this.playerPosition.Col, this.playerPosition.Row);
}
private movePlayer(col: number, row: number) {
if (row < 0) {
this.presentToast('Hey!', 'What kind of unreliable Santa are you?');
}
else if (row < this.maze.Rows) {
this.moveSection('santa',
col * (this.maze.CellPixels),
row * (this.maze.CellPixels)
);
this.playerPosition = new MazePosition(row, col);
this.checkForItemHits();
} else {
if (!this.hasPresent1 || !this.hasPresent2 || !this.hasPresent3) {
this.presentToast('Hey!', 'You haven\'t found all the presents yet, Santa!');
} else {
this.presentToast('Ho ho ho!', 'You found all the presents, Santa!\nChristmas can come now ;-)');
}
}
}
private moveSection(elementName: string, xOffset, yOffset) {
var element = document.getElementById(elementName);
if (element) {
var transformAttr = ' translate(' + xOffset + ',' + yOffset + ')';
element.setAttribute('transform', transformAttr);
}
}
private checkForItemHits() {
console.log(this.playerPosition.Col, this.playerPosition.Row, '-', this.itemPresent1.Col, this.itemPresent1.Row);
if (this.playerPosition.Col == this.itemPresent1.Col
&& this.playerPosition.Row == this.itemPresent1.Row) {
this.hasPresent1 = true;
this.presentToast('Hey!', 'You\'ve found present 1, Santa!');
this.hide('present1');
}
if (this.playerPosition.Col == this.itemPresent2.Col
&& this.playerPosition.Row == this.itemPresent2.Row) {
this.hasPresent2 = true;
this.presentToast('Hey!', 'You\'ve found present 2, Santa!');
this.hide('present2');
}
if (this.playerPosition.Col == this.itemPresent3.Col
&& this.playerPosition.Row == this.itemPresent3.Row) {
this.hasPresent3 = true;
this.presentToast('Hey!', 'You\'ve found present 3, Santa!');
this.hide('present3');
}
}
private hide(elementName: string) {
var element = document.getElementById(elementName);
element.style.display = "none";
}
private async presentToast(header: string, message: string) {
const toast = await this.toastController.create({
header: header,
message: message,
duration: 5000,
position: 'top'
});
await toast.present();
}
}
In GameService we set the position of Santa and the three presents. In the Start() method we initialize the maze and the player (Santa). The Navigate() method ensures the correct movements of Santa. When Santa finds a gift, the checkForHits() method detects it and issues a toast. A found gift is hidden using the hide() method.
We have to bind the buttons to the GameService so that the navigation works. To do this, we first open arrow-buttons.component.ts and import and inject the service:
import { Component, OnInit } from '@angular/core';
import { GameService } from 'src/app/services/game.service';
@Component({
selector: 'app-arrow-buttons',
templateUrl: './arrow-buttons.component.html',
styleUrls: ['./arrow-buttons.component.scss'],
})
export class ArrowButtonsComponent implements OnInit {
public isPortrait: boolean;
constructor(public game: GameService) { }
ngOnInit() {
this.checkOrientation();
}
private checkOrientation() {
var mq = window.matchMedia("(orientation: portrait)");
this.isPortrait = mq.matches;
mq.addListener(m => {
this.isPortrait = m.matches;
});
}
}
At the end we have to equip all buttons in arrow-buttons.component.html with (click) events:
<!-- Button group for portrait mode -->
<ion-grid id="buttons-portrait" *ngIf="isPortrait">
<ion-row>
<ion-col size="12">
<ion-button expand="block" (click)="game.Navigate('KeyW')">
<ion-icon name="md-arrow-round-up"></ion-icon>
</ion-button>
</ion-col>
</ion-row>
<ion-row>
<ion-col size="6">
<ion-button expand="block" (click)="game.Navigate('KeyA')">
<ion-icon name="md-arrow-round-back"></ion-icon>
</ion-button>
</ion-col>
<ion-col size="6">
<ion-button expand="block" (click)="game.Navigate('KeyD')">
<ion-icon name="md-arrow-round-forward"></ion-icon>
</ion-button>
</ion-col>
</ion-row>
<ion-row>
<ion-col size="12">
<ion-button expand="block" (click)="game.Navigate('KeyS')">
<ion-icon name="md-arrow-round-down"></ion-icon>
</ion-button>
</ion-col>
</ion-row>
</ion-grid>
<!-- Button group for landscape mode -->
<ion-grid id="buttons-landscape" *ngIf="!isPortrait">
<ion-row>
<ion-col size="2">
<ion-button expand="block" (click)="game.Navigate('KeyW')">
<ion-icon name="md-arrow-round-up"></ion-icon>
</ion-button>
</ion-col>
<ion-col size="8"></ion-col>
<ion-col size="2">
<ion-button expand="block" (click)="game.Navigate('KeyS')">
<ion-icon name="md-arrow-round-down"></ion-icon>
</ion-button>
</ion-col>
</ion-row>
<ion-row>
<ion-col size="2">
<ion-button expand="block" (click)="game.Navigate('KeyA')">
<ion-icon name="md-arrow-round-back"></ion-icon>
</ion-button>
</ion-col>
<ion-col size="8"></ion-col>
<ion-col size="2">
<ion-button expand="block" (click)="game.Navigate('KeyD')">
<ion-icon name="md-arrow-round-forward"></ion-icon>
</ion-button>
</ion-col>
</ion-row>
</ion-grid>
Next time we’ll look at how we can get the letter keys W, A, S, and D to make Santa’s legs… Oh, and Christmas music comes along…
I hope you enjoyed this tutorial so far and you will be back on the 4th and last part next Sunday.
Happy reading and coding! [...]
December 8, 2019TutorialIn the first part of our X-Maze tutorial we created an Ionic project with three components called “Arrow-Buttons”, “Decoration” and “Maze”.
Today we we start to fill these components with content and make everything look pretty.
Part 2: Make it look pretty
Arrange the ArrowButtonsComponent
Let’s fill the ArrowButtonsComponent with a few buttons. For this we remove the automatically generated placeholder entry in arrow-buttons.component.html.
<p>
arrow-buttons works!
</p>
and replace it with this:
<!-- Button group for portrait mode -->
<ion-grid id="buttons-portrait"
*ngIf="isPortrait">
<ion-row>
<ion-col size="12">
<ion-button expand="block">
<ion-icon name="md-arrow-round-up"></ion-icon>
</ion-button>
</ion-col>
</ion-row>
<ion-row>
<ion-col size="6">
<ion-button expand="block">
<ion-icon name="md-arrow-round-back"></ion-icon>
</ion-button>
</ion-col>
<ion-col size="6">
<ion-button expand="block">
<ion-icon name="md-arrow-round-forward"></ion-icon>
</ion-button>
</ion-col>
</ion-row>
<ion-row>
<ion-col size="12">
<ion-button expand="block">
<ion-icon name="md-arrow-round-down"></ion-icon>
</ion-button>
</ion-col>
</ion-row>
</ion-grid>
<!-- Button group for landscape mode -->
<ion-grid id="buttons-landscape"
*ngIf="!isPortrait">
<ion-row>
<ion-col size="2">
<ion-button expand="block">
<ion-icon name="md-arrow-round-up"></ion-icon>
</ion-button>
</ion-col>
<ion-col size="8"></ion-col>
<ion-col size="2">
<ion-button expand="block">
<ion-icon name="md-arrow-round-down"></ion-icon>
</ion-button>
</ion-col>
</ion-row>
<ion-row>
<ion-col size="2">
<ion-button expand="block">
<ion-icon name="md-arrow-round-back"></ion-icon>
</ion-button>
</ion-col>
<ion-col size="8"></ion-col>
<ion-col size="2">
<ion-button expand="block">
<ion-icon name="md-arrow-round-forward"></ion-icon>
</ion-button>
</ion-col>
</ion-row>
</ion-grid>
We have created two different button groups based on ion-grid. Depending on the orientation of the screen, one or the other group should be displayed. This is ensured by the *ngIf instructions.
For these to work, we need to program the appropriate logic. In arrow-buttons.component.ts we add this:
import { Component, OnInit } from '@angular/core';
@Component({
selector: 'app-arrow-buttons',
templateUrl: './arrow-buttons.component.html',
styleUrls: ['./arrow-buttons.component.scss'],})
export class ArrowButtonsComponent implements OnInit {
public isPortrait: boolean;
constructor() { }
ngOnInit() {
this.checkOrientation();
}
private checkOrientation() {
var mq = window.matchMedia("(orientation: portrait)");
this.isPortrait = mq.matches;
mq.addListener(m => {
this.isPortrait = m.matches;
});
}
}
With the help of some CSS, we position our button groups in arrow-buttons.component.scss as overlays:
#buttons-portrait {
position: absolute;
bottom: 10px;
width: 100%;
z-index: 1001;
}
#buttons-landscape {
position: absolute;
top: 50%; transform: translateY(-50%);
width: 100%;
z-index: 1001;
}
If the screen is in portrait orientation, the buttons are placed in a group at the bottom of the screen (see following figure).
If the screen is in landscape mode, the buttons are placed in the middle of the left and right edges of the screen. There they are good for gamer thumbs to reach 😉 (see following figure).
Assets
To make our app pretty, I’ve prepared some graphics that you can download here:background.svgdecoration.svgmaze.svgtitle.svg
Copy background.svg and title.svg into the assets folder of our app project (you can delete the file shapes.svg at the moment).
Did I already say that I love Scalable Vector Graphics (SVG)? Why? You can read the answer in my Ionic 4 book in chapter 8.8.
A few cool things that you can do with SVGs I’ll show you in this tutorial, too.
Background
First of all we want to use the background.svg file as a background in our app. To do this, we enter the following in home.page.scss:
ion-content {
--background: url(../../assets/background.svg) no-repeat 50% center/cover;
}
Before I explain for long what this CSS instruction does, look for yourself:
Title
We want to place the title now. You remember: In home.page.html we have a <div id=title></div> (see the first part of our X-Maze tutorial). That’s the placeholder for our title.
For this we write the following CSS in home.page.scss:
@media screen and (min-height: 500px) {
#title {
content: url(../../assets/title.svg);
position: absolute;
top: 0px;
left: 50%;
transform: translateX(-50%);
width: 50vw;
@media screen and (min-height: 600px) {
width: 80vw;
}
@media screen and (min-height: 700px) {
top: 20px;
width: 90vw;
}
@media screen and (min-height: 800px) {
top: 40px;
width: 100vw;
}
z-index: 1000;
}
}
@media screen and (min-width: 500px) {
#title {
content: url(../../assets/title.svg);
position: absolute;
bottom: 5px;
right: 5px;
width: 20vw;
z-index: 1000;
}
}
With these instructions, we assign title.svg to our title div and determine that depending on the size (and orientation) of a screen, our title will either be centered at the top…
… or at the bottom right.
Decoration
Let’s make the DecorationComponent what its name promises: a decorative component.
To do this, we copy the entire contents of decorations.svg and paste it into decoration.component.html.
You wonder why you pack this SVG stuff into an HTML component? Well, then start our app and be amazed:
And thanks to the wonderful features of SVGs, the whole thing looks great in the landscape view as well (and on a huge screen, too):
Maze
Last but not least, we fill the MazeComponent. Here we proceed exactly as we did with the DecorationComponent: We copy the entire contents of maze.svg into maze.component.html.
That’s the result:
Now our UI is ready. Looks great, right?
You’ve discovered Santa Clause in the labyrinth and you’re curious what he’s looking for there? Then look forward to next Sunday, where we’ll get Santa up and running.
Until then:
Happy reading and coding! [...]
December 1, 2019TutorialI first had the idea to write a “Making of the Halloween Maze”. But Halloween is over and Christmas is coming. I think it’s better to update the topic and to start a little tutorial series “How to make an X-Maze” (a playable labyrinth with a Christmas look). It’s supposed to show the creative side of Ionic: graphics, animations, audio.
The series at a glance: Part 1: Make an Ionic 4 app project Part 2: Make it look pretty Part 3: Make it move nicely Part 4: Make it sound x-massy
Every Advent Sunday there will be a new part of the tutorial.
For Christmas, I’ll give you the finished program code for download.
Today is the first Advent! So let’s start with our first part …
Part 1: Make an Ionic 4 app project
Preparations
Starting an Ionic project is not difficult once you have made all the necessary installations. If you are not so familiar with this topic, you’re in luck: check out the Look Inside for my new Ionic book on this website. In chapter 1.2 “Installations” you will learn how to do it.
Create the project
In console / terminal move to your dev folder of choice and type
$ ionic start x-maze blank
to create your Ionic project.
Choose Angular as the framework you want to use to develop your app.
After the Ionic CLI has created our project, we switch to its project folder and continue …
Create components
Our project will include a page called “Home” (which already exists). We’ll populate it with three components called “Arrow-Buttons”, “Decoration” and “Maze”, which we are now creating.
In terminal type the following commands:
$ ionic g component components/Arrow-Buttons
$ ionic g component components/Decoration
$ ionic g component components/Maze
In a subfolder “components” you’ll now find the new components.
Create a components module
In order to be able to embed our components in our app page in an elegant way, let’s quickly write down a component module called components.module.ts, which we put in our “components” subfolder:
import { NgModule } from '@angular/core';
import { CommonModule } from '@angular/common';
import { IonicModule } from '@ionic/angular';
import { ArrowButtonsComponent } from './arrow-buttons/arrow-buttons.component';
import { DecorationComponent } from './decoration/decoration.component';
import { MazeComponent } from './maze/maze.component';
const PAGES_COMPONENTS =
@NgModule({
declarations: ,
imports: ,
exports:
})
export class ComponentsModule {}
Import the components module into page module
In home.module.ts we can now add:
import { ComponentsModule } from './../components/components.module';
and at the imports:
imports: ,
...
Now we are able to import and use the components in the home page.
Build the UI structure of our app
Now we build the UI structure for our app using the components in home.page.html:
<ion-content>
<div id="title"></div>
<app-decoration></app-decoration>
<app-maze></app-maze>
<app-arrow-buttons></app-arrow-buttons>
</ion-content>
If we start our app with
$ ionic serve
and take a first look at what we’ve done so far, it looks like this:
Of course, that doesn’t look that great yet. But the basic architecture of our app is done and and we’ll make it look pretty in the second part of our X-Maze tutorial.
CU next Sunday, December 8, 2019.
Until then:
Happy reading and coding! [...]

November 16, 2019AnnouncementA few days ago my Halloween raffle ended. Thanks to all who participated! I hope you enjoyed it.
And here are the lucky winners of my Ionic books:
Aaron N.Evita M.Marc S.
Congratulations!
You’ll receive a mail from me in the next few days …
Happy reading & coding!
Andreas aka Andionic [...]
November 1, 2019AnnouncementHello, today I would like to show you the creative side of the great app development framework Ionic:
Have a look at https://halloween.andreas-dormann.de
The labyrinth is not just a gimmick. If you don’t get lost in it, you can win one of three of my books “Ionic 4 # / Creating awesome apps for iOS, Android, Desktop and Web”!
The competition will run until 11.11.2019.
In the next few weeks I’ll write a tutorial “The Making of Halloween Maze”. Here I’ll describe step by step the origin of this little scary game. Let yourself be inspired and stop by on https://ionic.andreas-dormann.de.
Happy Halloween! [...]

October 26, 2019Advanced TipsOut of the box Angular provides two strategies already implemented for us, pretty explanatory from the name:
NoPreloading — no modules are preloaded, this is the default behaviourPreloadAllModules — all modules are preloaded as fast as possible
While this will work in some scenarios, we might want to create something a bit more complex here.
David Dal Busco and Aaron Sterling developed a custom preloading strategy that can be triggered only on demand.
Read David’s article:
Preloading modules in Ionic v4 [...]
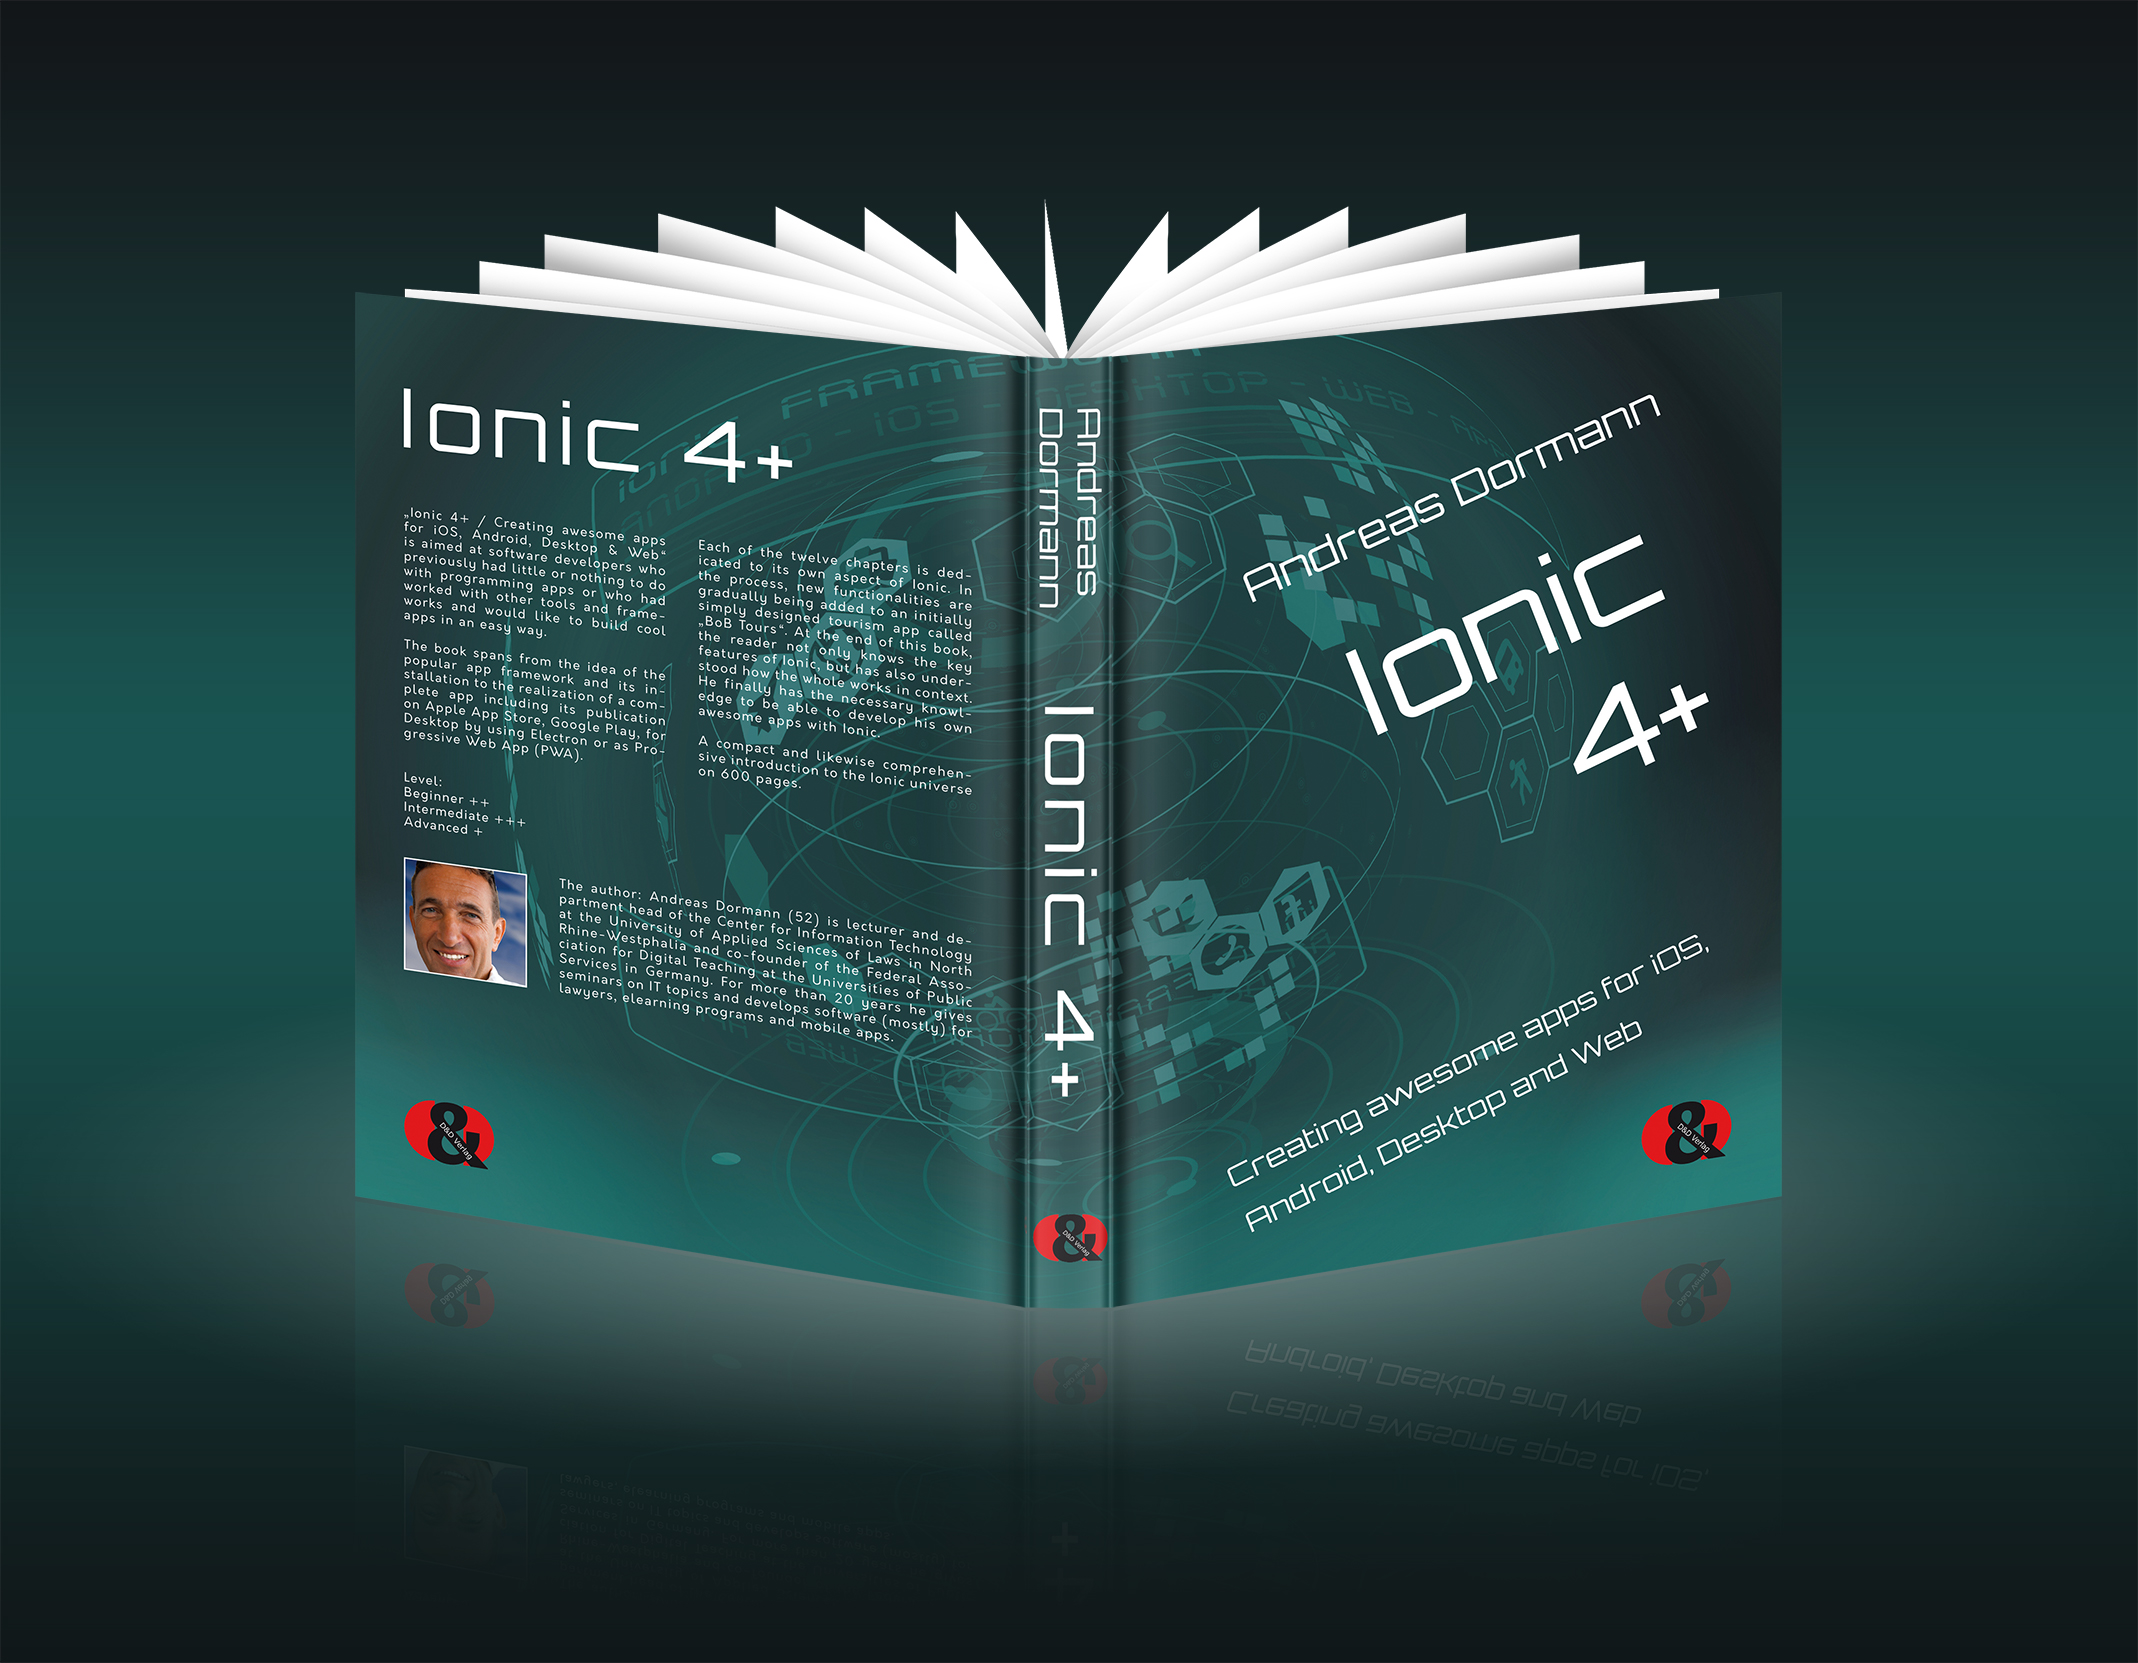
October 2, 2019AnnouncementIonic 4+ / Creating aweseome apps for iOS, Android, Desktop and Web.
This book is aimed at software developers who previously had little or nothing to do with programming apps or who had worked with other tools and frameworks and would like to build cool apps in an easy way.
The book spans from the idea of the popular app framework and its installation to the realization of a complete app including its publication on Apple App Store, Google Play, for Desktop by using Electron or as Progressive Web App (PWA).
Each of the twelve chapters is dedicated to its own aspect of Ionic. In the process, new functionalities are gradually being added to an initially simply designed tourism app called „BoB Tours“. At the end of this book, the reader not only knows the key features of Ionic, but has also understood how the whole works in context. He/She finally has the necessary knowledge to be able to develop his/her own awesome apps with Ionic.
A comprehensive introduction to Ionic on more than 600 pages.
Level: Beginner ++ | Intermediate +++ | Advanced +
Table of Contents: 1. Introduction 2. Angular Essentials3. The first app4. Navigation5. Services and Storages6. UI Components7. Form validation8. Theming, styling, customizing9. Ionic Native10. Communication and Messaging11. Debugging and Testing12. Build, Deploy and PublishBonus chapters: B1. Ionic without any frameworkB2. Ionic and CapacitorB3. Ionic and ReactB4. Ionic and Vue [...]